Features You’ll Come To Rely On
completes all of your needs to manage users of your website
- Registration
- Profile
- Login
- Form Fields
- Export/Import
- E-mail Notification
- Admin approval
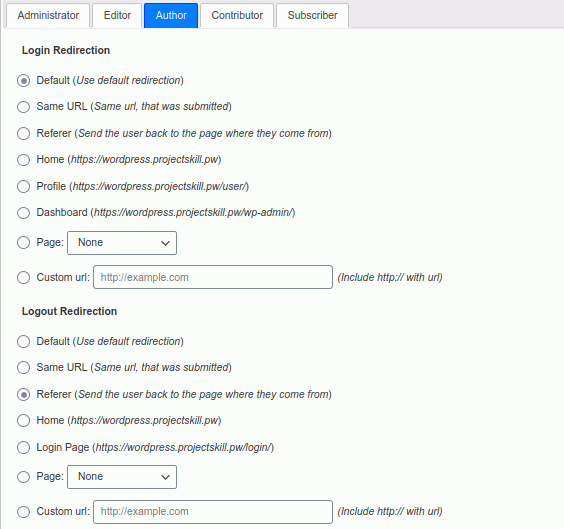
- Redirection
- BuddyPress xProfile Export
- WooCommerce Integration
- WPML Integration
- Switch filter or action hooks
- Override default WP emails
- Personalize default User Meta forms
- User Listing
- Restrict Content
- Author Box
- Public Profile
- MailChimp Integration
User Registration
Create your user registration form with drag-and-drop fields.
Register users on front-end
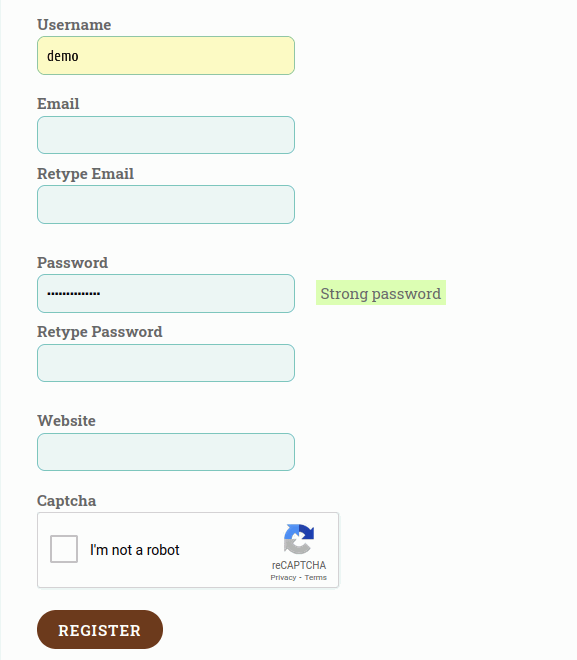
No need for WordPress default user registration! Registration shortcode, widget and template tag give you power to enable registration via front-end. Use different registration forms for different roles. Allow user registration without a username, just email.
Add extra fields on registration
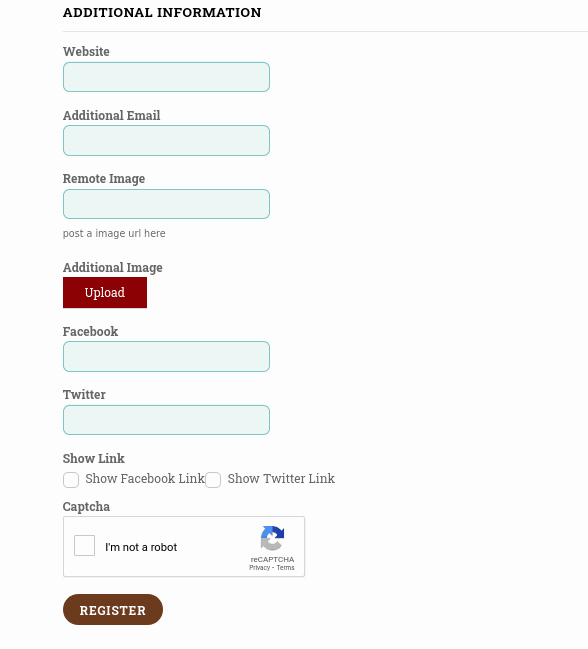
You are not limited to use only the default WordPress fields in the registration form. Build your form with extra drag-and-drop fields. Data from extra fields will be stored at wp_usermeta table, so any other plugin can use the data very easily. Need a long registration form? Don’t worry! Subdivide long form with pagination.
User Profile
Build user profile with drag-and-drop fields then show that profile at front-end or backend.
Role based user profile on front-end
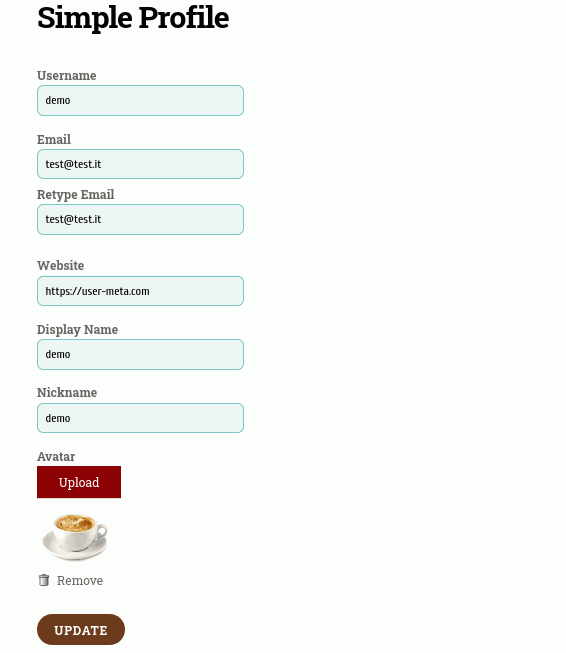
No more need to redirect user to default WordPress profile. Instead, show user profile at front-end using shortcode, widget or template tag. Use different user profile features for different user role.
Populate user profile with extra fields
Like registration, adds extra fields to user profile too. Every default or extra fields contain proper validation (both client side and server side) and own configuration to best suit your needs.
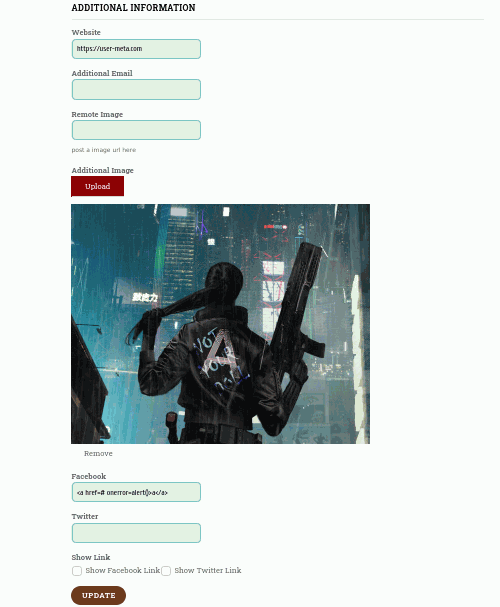
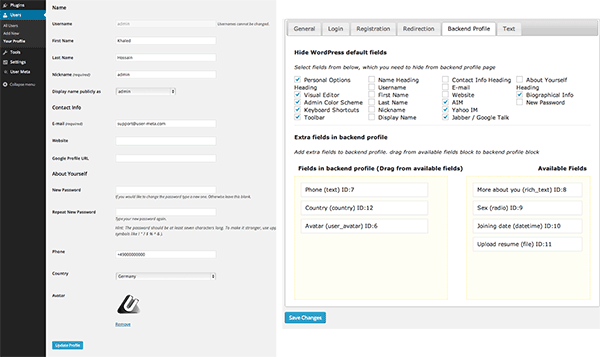
Extra fields to backend user profile
Your pre created extra fields could be added to default backend user profile. Want to hide the unnecessary field from backend profile? Yes! You have the option to hide them.
User Login
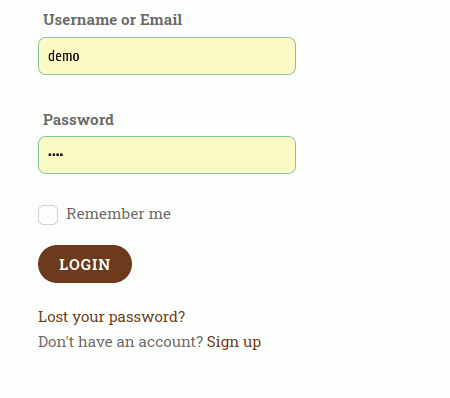
Provide ready to use login facility with several configuration
Login user in front-end
Use shortcode, login widget or template tag for front-end login. Not only login but also forget password and reset password are in front-end. Customize the whole login page with extra fields.
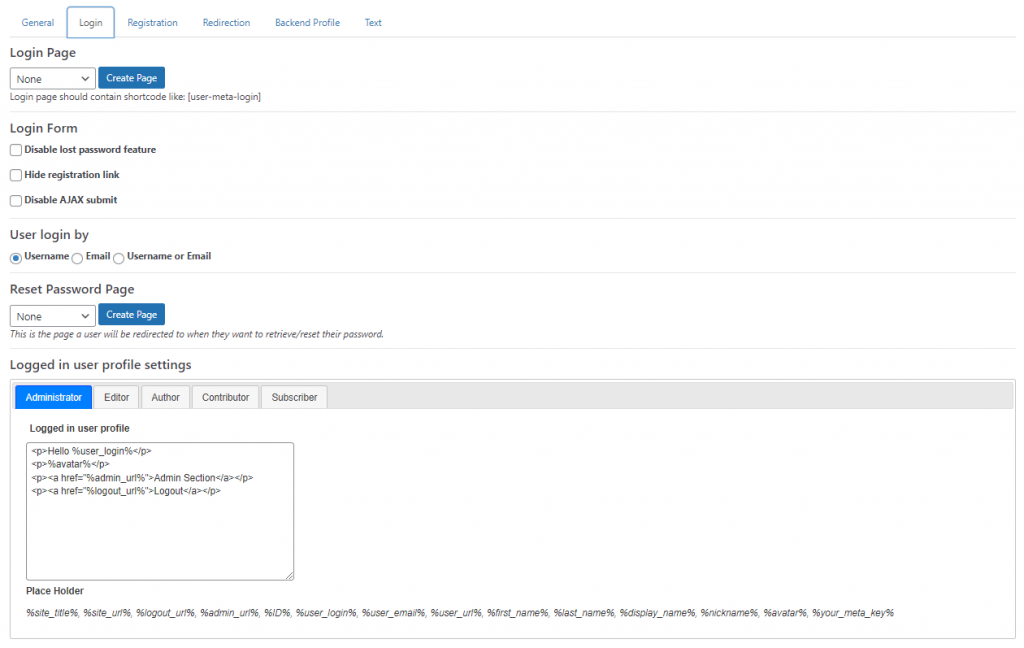
Configure user login criteria
Login users with username, email or both username/email. Show role based data after login. Optionally, you can disable access to wp-login.php
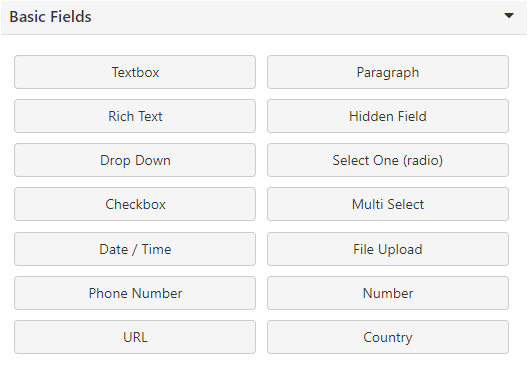
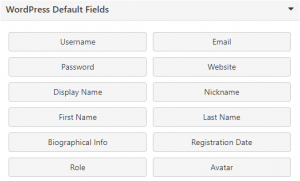
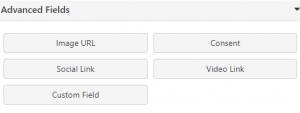
Available Fields to Build Form
Everything you need to build your profile or registration form is here. Every field contains its own configuration and validation. Very easy to use the features, just add them to your form and you are done.

User Export/Import
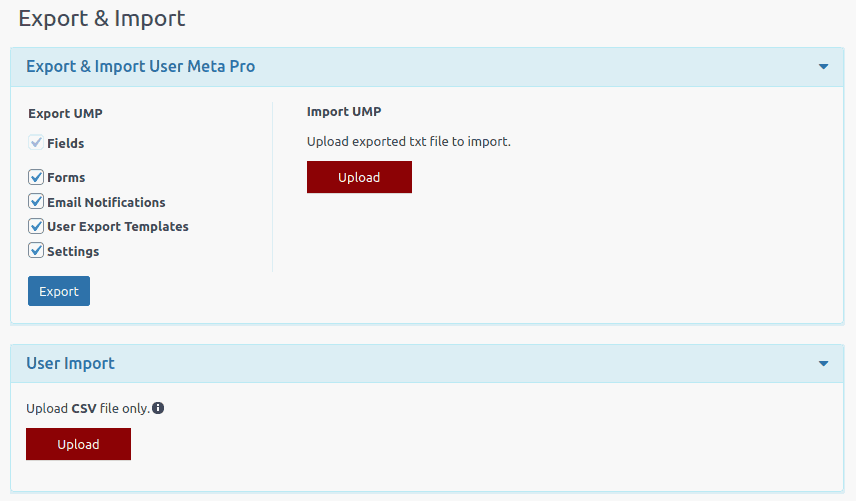
Bulk users export/import to or from csv file.
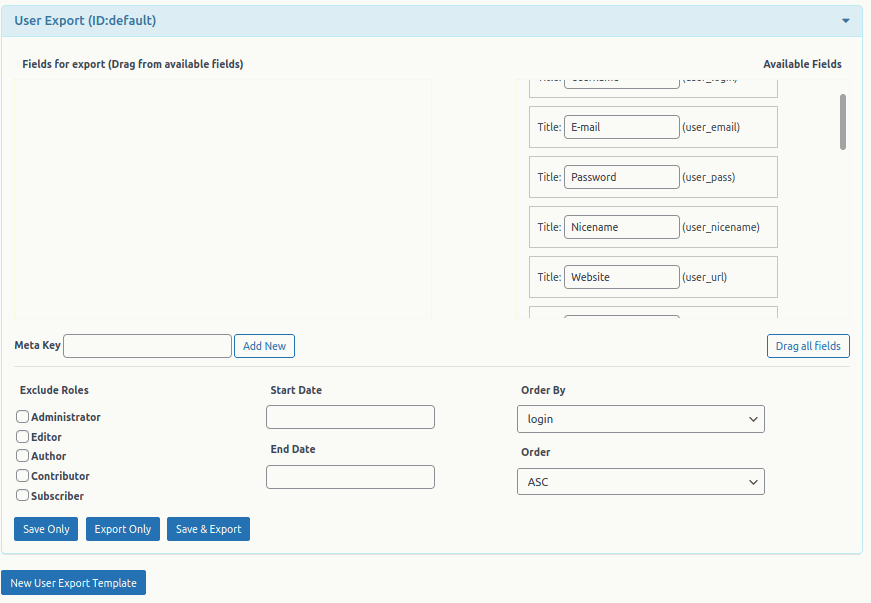
Users export to CSV with extra fields
Just select which field you want to export, and you are done. Filter users with role or date. Optionally, you can create several export templates with different settings.
Import users with extra fields
Import bulk users from csv file. You can map fields from csv to your site to import. Import only new users or update existing user’s data. Optionally, send bulk email while importing new users.
E-mail Notifications
Don’t let the system send an email to users which does not reflect your voice and branding
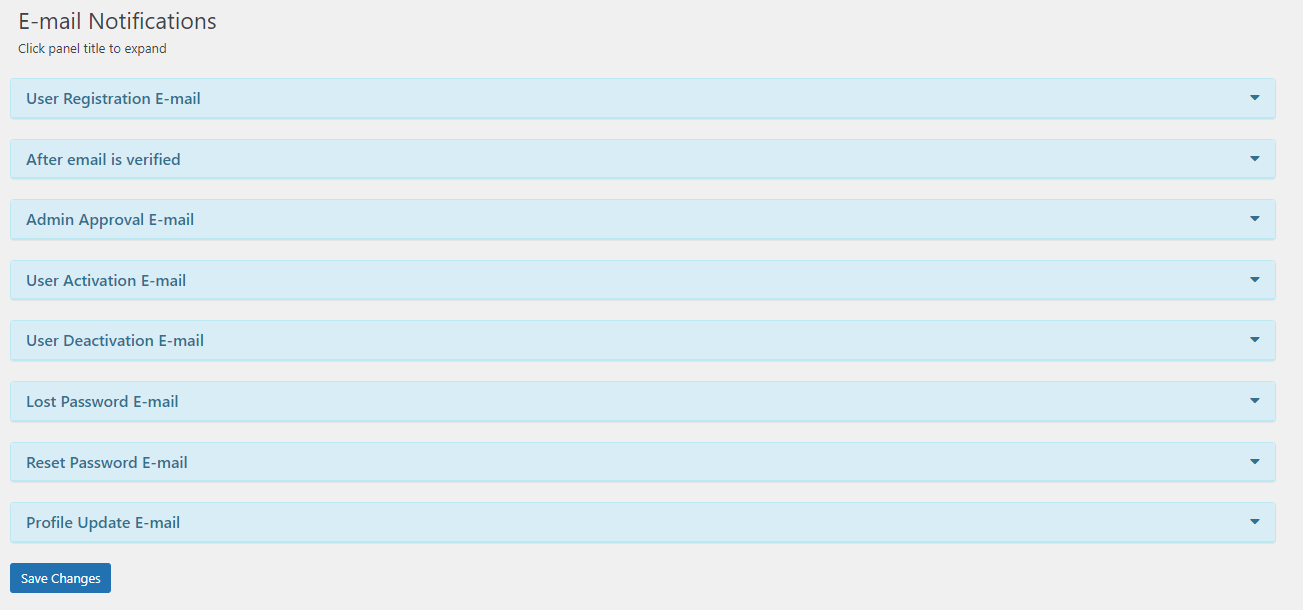
Customize all system generated email
Send user custom email while they are registering. Send email to admin with custom fields. Get notified admin if user update their profile. Customize the features of lost password, email verification, user activation or deactivation email.
Include extra field to email subject or body
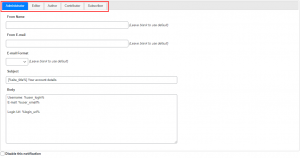
Use placeholder to include any extra field’s data to email. Change email sender information for certain types of email.
Change default email sender
Every email sent from your site can be customized to use a particular name and email.

Admin Approval & Email Verification
Control how users register at your site and get access
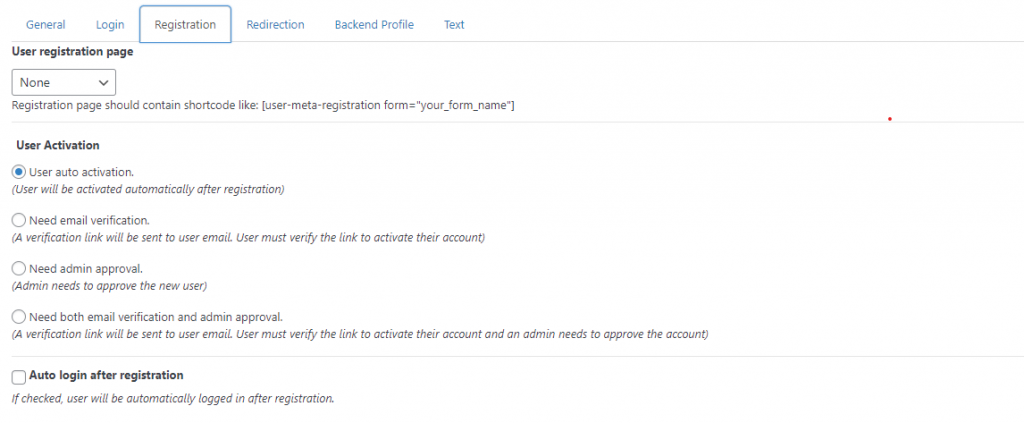
Let user verify their email before accessing your site, or let admin can take decisions as to which user should get access. Let user automatically log-in immediately after registration.
Redirection
Redirect user to desired page after login, logout or registration
Role based redirection
Redirect user to certain page features based on their role and action
BuddyPress xProfile Export
Features
- Export BuddyPress xProfile data with UMP export tool.
Activation
Activate BuddyPress xProfile Export from User Meta >> Add-ons menu by turning on the respective box’s switch.
img-01: BuddyPress xProfile Export
Details
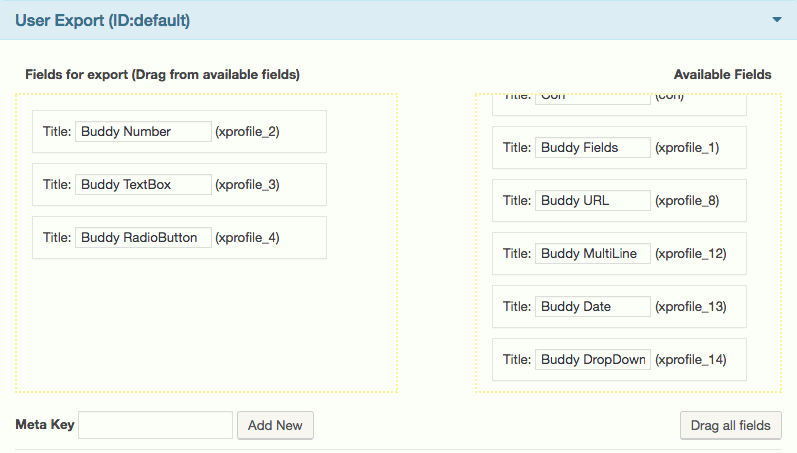
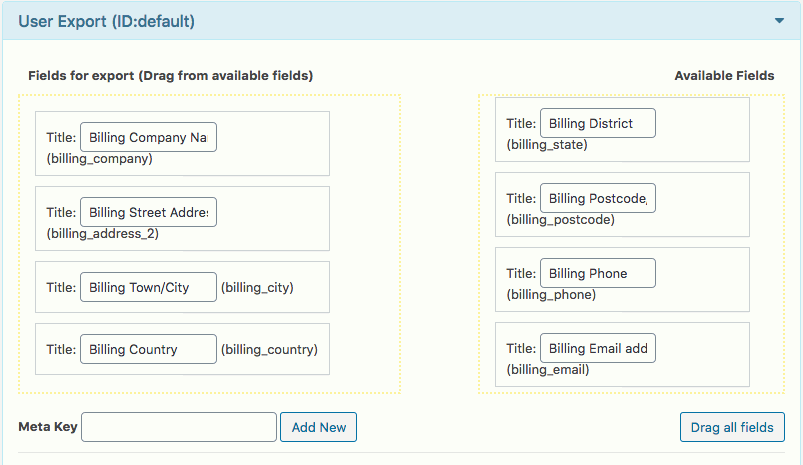
You can find BuddyPress xProfile fields are ready to be exported in User Meta Pro user export tool (go to User Meta >> Export & Import >> User Export). Now treat these BuddyPress fields like any other normal fields for the exportation purpose. Drag fields from Available Fields box to Fields for export box.
WooCommerce Integration
Integrate UMP’s shared fields with WooCommere (modify WooCommerce forms) and export data.
Features :
- Add UMP fields to WooCommerce Registration, Account Details and Checkout forms
- Display added fields data in order details and preview
- Export WooCommerce fields with UMP import/export tool
- Modify WooCommerce forms with UMP shared fields
Activation :
- Activate WooCommerce Integration from User Meta >> Add-ons menu by turning on the respective box’s switch.
Details :
Go to “WooCommerce Integration >> Options”, from where you can set up all settings related to WooCommerce integration to User Meta Pro.
Export WooCommerce Fields Data
Upon the activation of WooCommerce Integration addon, all user data fields of WooCommerce are available to be exported with the UMP export tool.
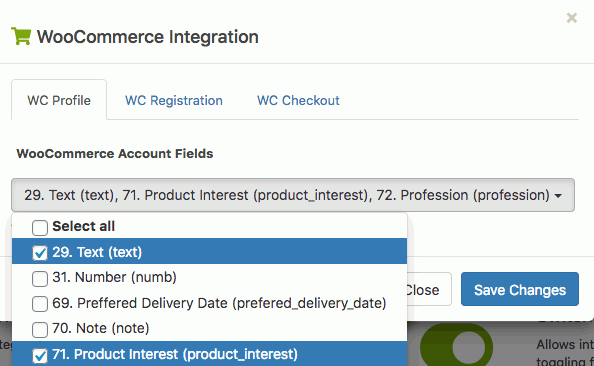
Add Fields to WooCommerce Profile Form
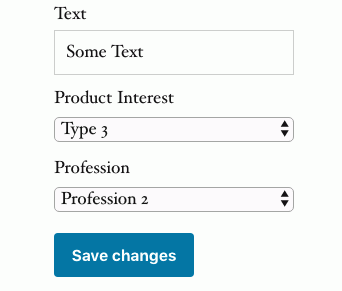
From WC Profile tab, UMP shared fields can be set which will be added to the WooCommerce profile form.
Below is an implementation example of the modified profile form.
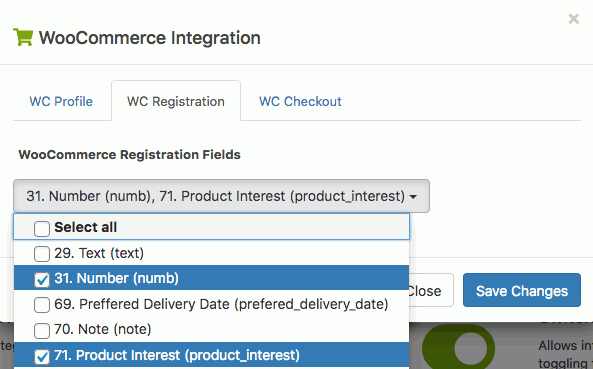
Add Fields to WooCommerce Registration Form
From WC Registration tab, UMP shared fields can be set which will be added to the WooCommerce registraion form.
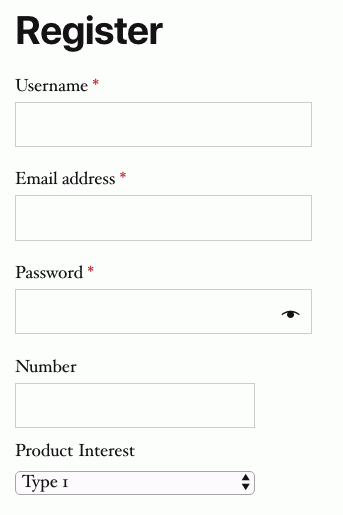
Below is an implementation example of the modified registration form.
Add Fields to WooCommerce Checkout Form
From WC Checkout tab, UMP shared fields can be set which will be added to the WooCommerce checkout form. Fields can be included in three different positions, after customer details, before shipping fields and before order review with the respective options.
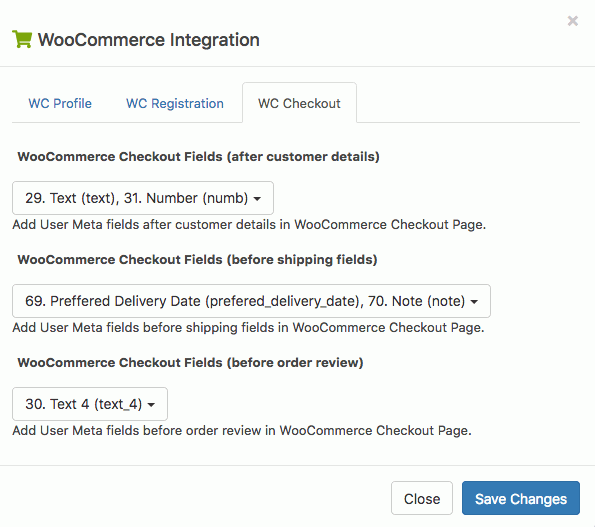
Below is an implementation example of the modified checkout form.
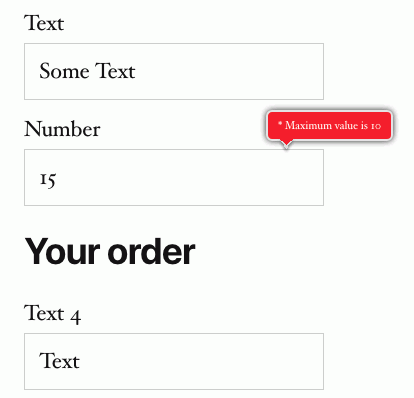
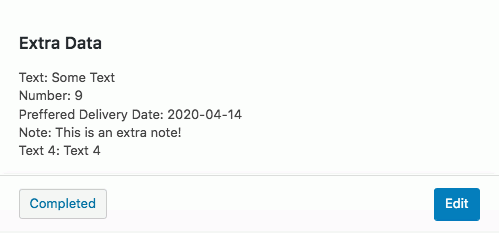
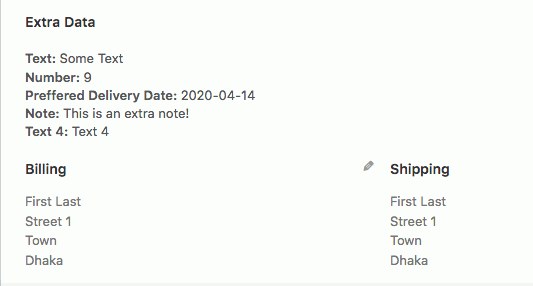
These added fields data in checkout form can be found in order preview and order details under the section name Extra Data.
WPML Integration
A free add-on to integrate User Meta Pro with WPML

Features
- Allows translations of complete User Meta Pro plugin’s generated texts.
- Generate wpml-config.xml to translate dynamic text.
- Translate page ids like login, registration, profile page.
Activation
- Activate WPML Integration from User Meta >> Add-ons menu by turning on the respective box’s switch.
Switch Filter or Action Hooks
Allows integration or avoid plugin conflict by toggling filter or action hooks. You can switch filter and action hooks by enabling/disabling.

Features
- Enable/disable action and filter hooks
- List of hooks grouped by their uses
- Multiselect toggling with select all and also group by options
Activation
- Activate Switch filter or action hooks from User Meta >> Add-ons menu by turning on the respective box’s switch.
Details
Go to Switch filter or action hooks >> Options. There you will get multiselect option where you can toggle the hooks individually and also with select all or select by group. Enable/disable your needed hooks and save the changes. There are four different hooks group available. These hooks will allow others plugins to talk with User Meta Pro. Enable them to integrate with others plugin or disable them for avoiding plugin conflict.
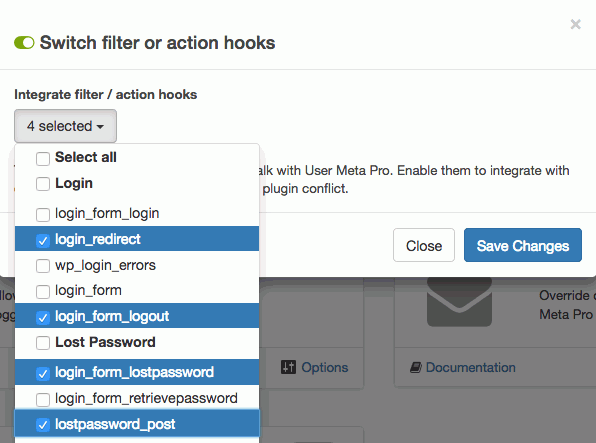
Select all
This option to select all the available hooks.
Login
Hooks related to login are:
- login_form_login
- login_redirect
- wp_login_errors
- login_form
- login_form_logout
Lost Password
Available hooks related to lost password are:
- login_form_lostpassword
- login_form_retrievepassword
- lostpassword_post
- retrieve_password
- allow_password_reset
- retrieve_password_key
- retrieve_password_title
- retrieve_password_message
- lostpassword_redirect
- lost_password
- lostpassword_form
Reset Password
Available hooks related to reset password are:
- login_form_resetpass
- login_form_rp
- password_reset_key_expired
- validate_password_reset
- password_reset
- resetpass_form
User Registration
Available hooks related to user registration are:
- login_form_register
- registration_redirect
- register_form
- user_registration_email
- register_post
- registration_errors
Override default WP emails
Override default WordPress email with User Meta Pro generated emails.

Features
- Override default email notification
- Control over email notification and choose what to apply
- Override user registration and reset password email
Activation
- Activate Override default WP emails from User Meta >> Add-ons menu by turning on the respective box’s switch.
Details
Go to Override default WP emails >> Options. There you will get two different checkboxes. Enable those checkboxes to override default WordPress email with User Meta Pro generated emails. This could be useful, when you need registration form other than UMP but custom email notification by UMP.
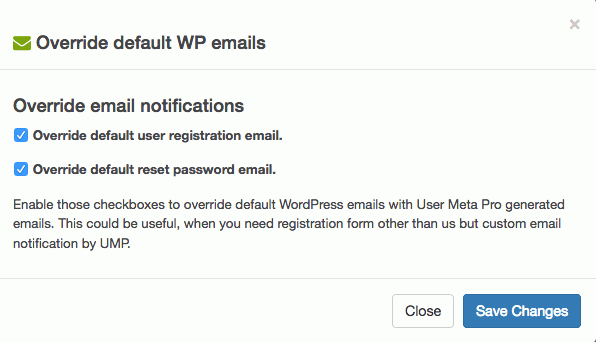
Override default user registration email
Enable Override default user registration email checkbox to override default WordPress user registration email with User Meta Pro generated email. Disable it and you are going back to WP default email.
Override default reset password email
Enable Override default reset password email checkbox to override default WordPress reset password email with User Meta Pro generated email. Disable it and you are going back to WP default email.
Personalize Default User Meta Forms
Personalize default User Meta login, lost password and reset password forms.
Features
- Add custom styles to default user meta forms
- Use custom labels, placeholder, headings, intro texts and so on
- Personalize Login, Lost Password and Reset Password forms
Activation
Activate Personalize default User Meta forms from User Meta >> Add-ons menu by turning on the respective box’s switch.
Details
Go to Personalize default User Meta forms >> Options. There you will get three different tabs.
Login
Control every components of the Login form with CSS class, ID, title, heading, label and texts. Followings are the customizable options.
- Form ID
- Form Class
- Before Form
- After Form
- Login Label
- Login Placeholder
- Login ID
- Login Class
- Login Label Class
- Password Label
- Password Placeholder
- Password ID
- Password Class
- Password Label Class
- Remember Label
- Remember ID
- Remember Class
- Before Button
- After Button
- Registration Link Class
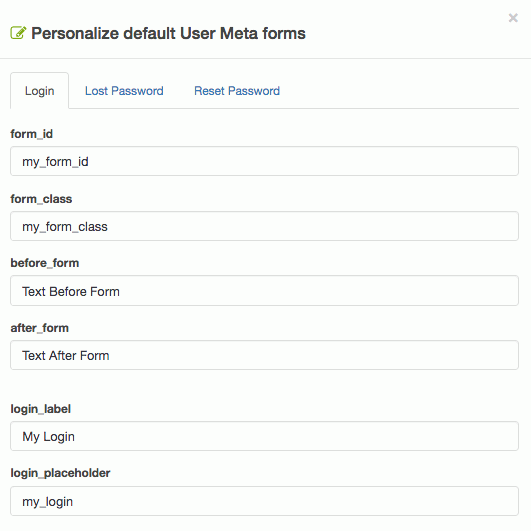
Put option’s values according to your needs and save the changes. No worries even if you leave any field blank, it will consider the default value by itself.
Lost Password
Control every components of the Lost Password form with CSS class, ID, title, heading, label and texts. Followings are the customizable options.
- Lost Password Title
- Form ID
- Form Class
- Before Form
- After Form
- Before Div
- After Div
- Intro Text
- Input Label
- Input Placeholder
- Input ID
- Input Class
- Input Label Class
- Button Value
- Button ID
- Button Class
- Before Button
- After Button
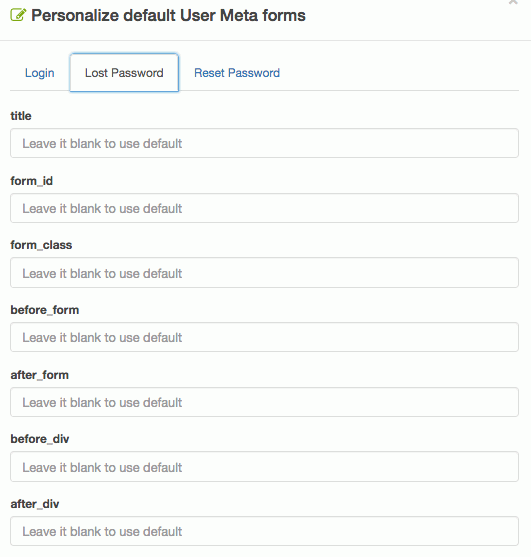
Put option’s values according to your needs and save the changes. No worries even if you leave any field blank, it will consider the default value by itself.
Reset Password
Control every components of the Reset Password form with CSS class, ID, title, heading, label and texts. Followings are the customizable options.
- Reset Password Title
- Form ID
- Form Class
- Before Form
- After Form
- Heading
- Intro Text
- Password-1 Label
- Password-1 Placeholder
- Password-1 ID
- Password-1 Class
- Password-1 Label Class
- Password-2 Label
- Password-2 Placeholder
- Password-2 ID
- Password-2 Class
- Password-2 Label Class
- Button Value
- Button ID
- Button Class
- Before Button
- After Button
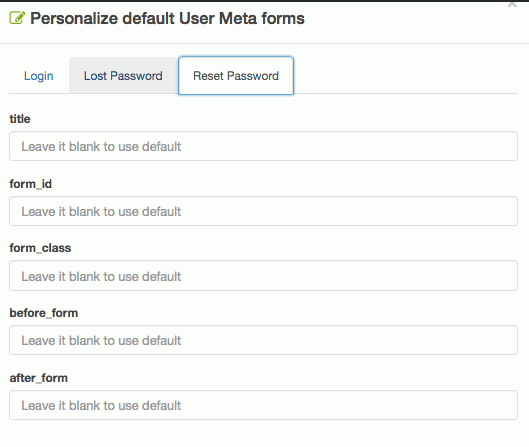
Put option’s values according to your needs and save the changes. No worries even if you leave any field blank, it will consider the default value by itself.
User Listing
Display customized user listing, both in the front and the backend including access to the user public profile.
Features
- Display users list on the frontend with shortcode
- User listing table with controls and customizations including searching and sorting
- Custom user list table with UMP field’s data
- Attach “Public Profile” link to user’s data
- Customize user list dashboard on the backend with custom columns
- Add columns for UMP fields and remove the default columns from “All Users” admin dashboard with the search feature on these
Activation
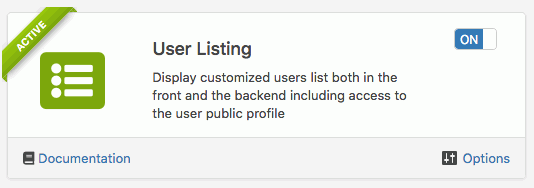
Activate User Listing from User Meta >> Add-ons menu by turning on the respective box’s switch.
Details
Go to “User Listing >> Options”, from where you can set up all settings related to user listing including the documentation on shortcodes to display user listing on the front-end.
Front-end Setup
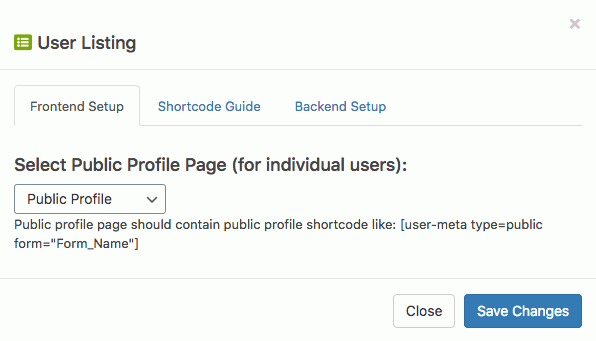
Display customized user lists anywhere (page, post, content) with the addon shortcodes. From Frontend Setup tab, a page can be set for the user’s public profile so that one can browse user profiles through given user listing links. Please note, public profile page should contain public profile shortcode like: [user-meta type=public form="Form_Name"]
Shortcodes
The basic shortcode to display user listing in the frontend is [user-meta-user-list], which displays a user list with the link to the user public profile and it contains all the existing users.
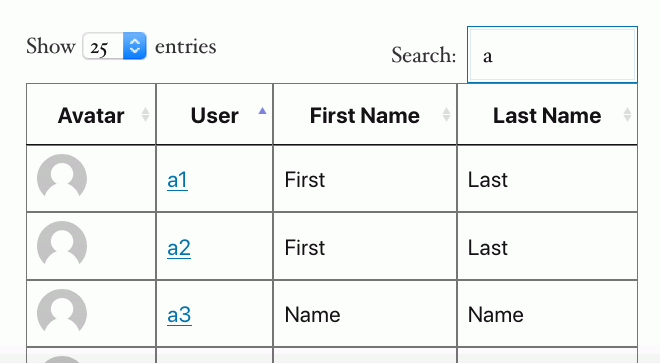
Below are the different options of the user listing shortcode.
Option: caption
Default: null
Description: Caption of the user table. No caption by default.
Example: [user-meta-user-list caption="My Caption"]
Option: role
Default: all
Description: Filter users by role, write multiple roles with comma separation.
Example: [user-meta-user-list role="author,subscriber"]
Option: fields
Default: null
Description: Fields to display in the user table. Write multiple shared fields ID with comma separation. Without this option, the user list contains default fields.
Example: [user-meta-user-list fields="1,2,3,4"]
Option: link-field
Default: null
Description: Only applicable if fields option is applied. Pick fields id (with comma separation) that will contain the user public profile link.
Example: [user-meta-user-list fields="1,2,3,4" link-field="1,2"]
Backend Setup
With this addon, you can easily customize the user list dashboard on the backend with custom columns. Adding new columns with UMP shared fields data and removing the existing default columns are both possible. From Backend Setup tab, including and excluding columns can be done by Add Column (UMP Shared Field) to Backend User List and Exclude Default Column from Backend User List select field respectively.
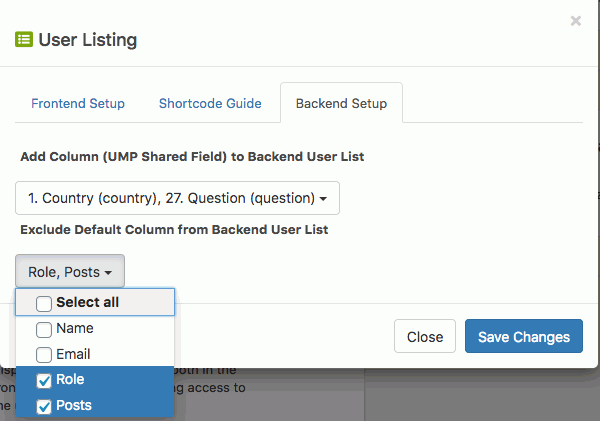
Below is an example of included and excluded columns of the All Users list.

Restrict Content
This add on will help you to tailor all the users’ permission to see your contents (pages/posts etc). You can moderate and censor your posts for different user class (i.e roles). And If you want to keep your premium content away from prying eyes, then you can set some of your contents available only for your logged in users too.
Activation
Go to Dashboard > User Meta > Add on , you will find the Restrict Content add on on the bottom of the page. Toggle the switch to activate this add on.

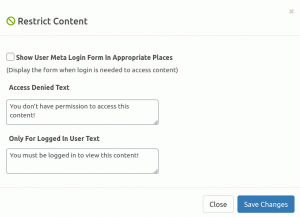
Click on the Options button if you want your users to login from the specific post You can also customize your prompts and dialogs in different places from his settings panel.
Features
- Make exclusive contents just for registered users
- Censor posts for roles
- Create role based exclusive contents and moderate access to them.
How to hide content
If you want to hide any specific post/page, in edit screen, locate the restrict menu at the right side-bar. It will be under Document tab, named UMP Restrict Content.
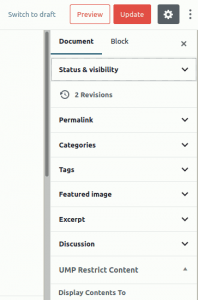
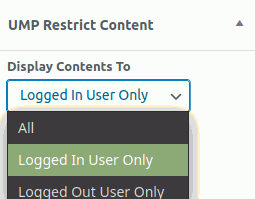
You have to open this menu and select, the Logged in User Only option.
How to hide or display for specific
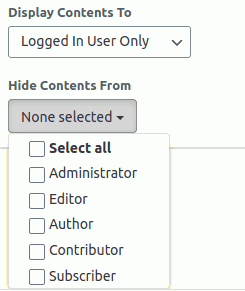
After you follow the steps above, click on the immediate option below Display Contents To . From there you can select role(s) to give permission for the post you are editing currently.
Author Box
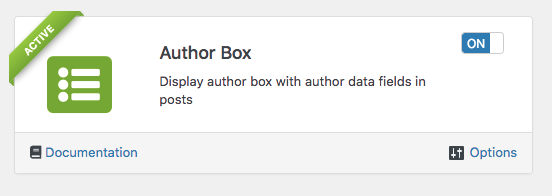
Use Author box to display a fully customizable and clean author bio section to your WordPress posts/pages with complete control.
Features
-
Add author bio section before/after your wordpress posts/pages
-
Customise all configurable fields to place it on your site perfectly
-
Include description, contacts, all social links and connections of author
-
Assign posts to guest authors to make blogging and contributing easier
-
Show portfolio and recent posts from the same author
-
Integrate seamlessly as we ensure simple setup and us
Activation
-
Easily activate the Author Box add-on from your WordPress main menu by turning on the switch of the respective box in User Meta>> Add-Ons section.
Details
Setting Up The Author Box
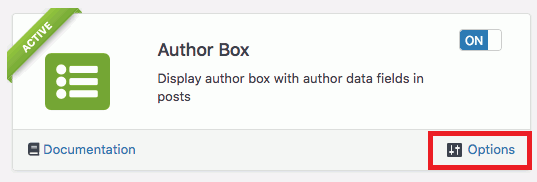
1. Go to “Author Box >> Options”, from where you can set up all settings related to the add-on.
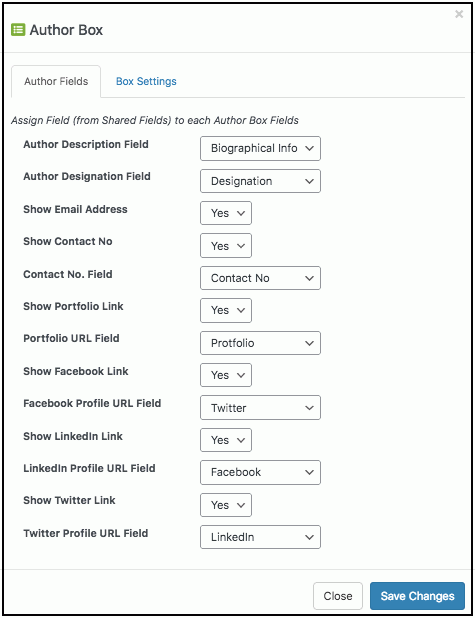
2. Find the “Author Fields” in the options and set up permissions and select field data(author information) for each field from many available options.
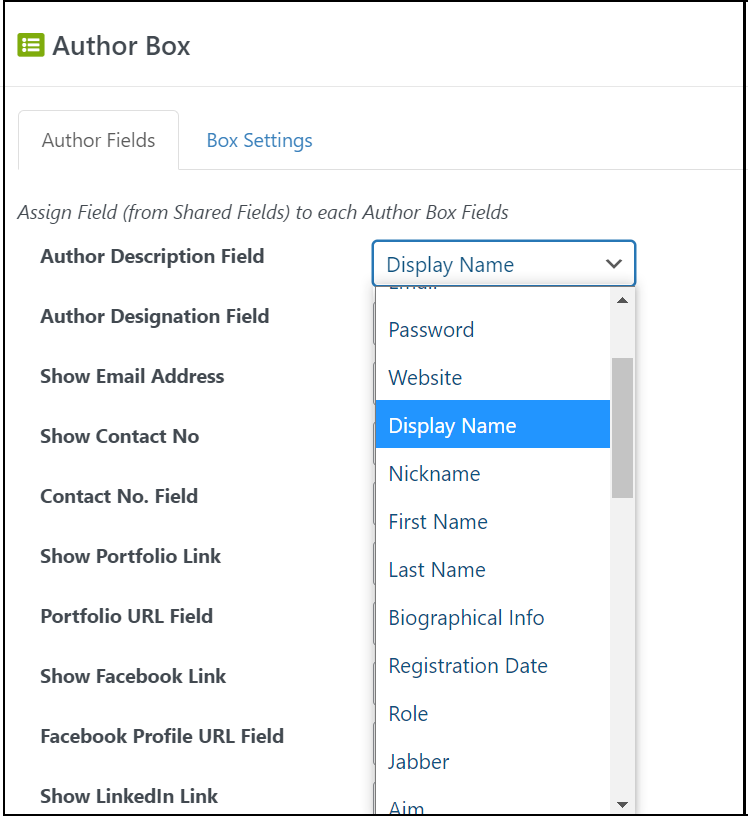
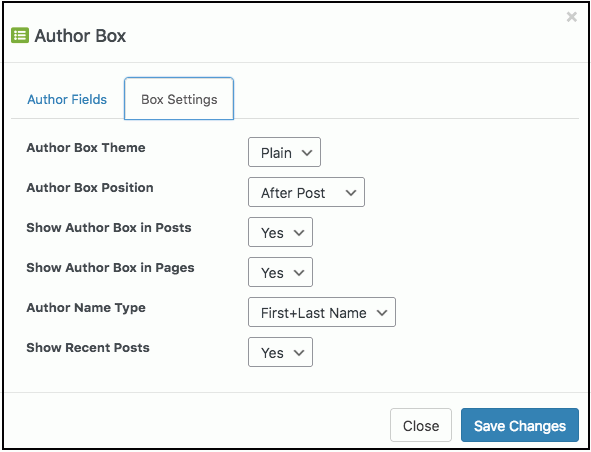
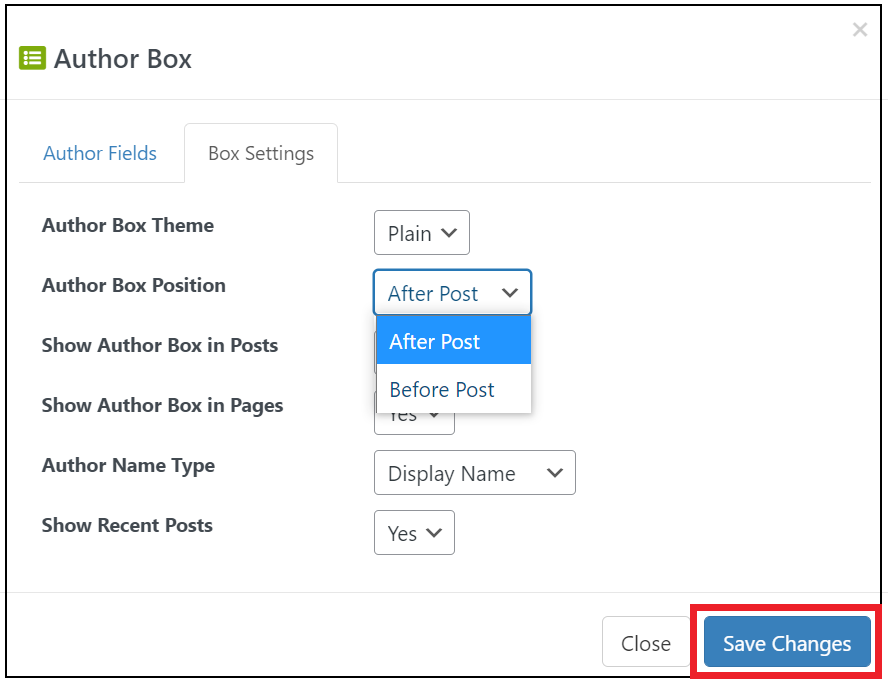
3. Go to “Box Settings” in the options and customize styles and display of the author box. Select your choices for each field and make sure to save the changes made.
Display Author Box in Pages or Posts
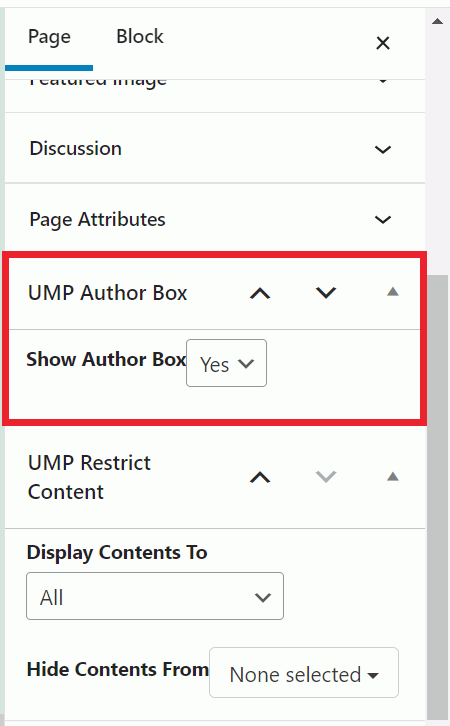
1. Go to the edit option or create a new page/post where you want to showcase an author box. Find “UMP Author Box” available in the tools on the right side.
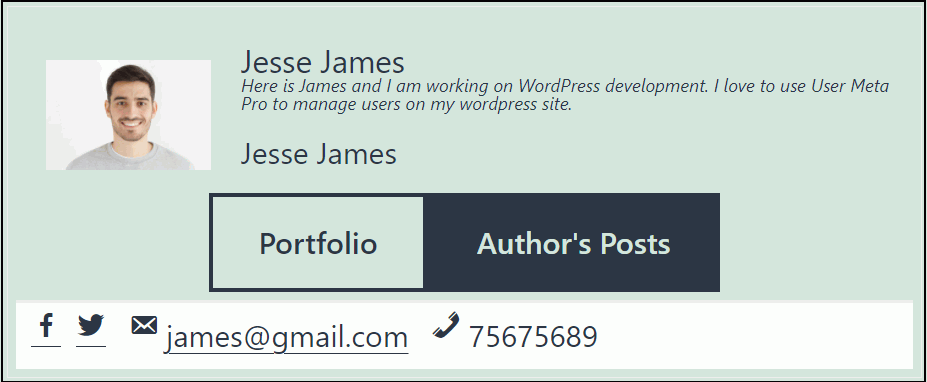
And find the author box with all the information of the author you choose on the published page or post.
Public Profile
Write user-meta shortcode to page or post. To create page go to Pages >> Add New.
The public user profile can be shown with this shortcode. The user_id is the parameters that need to be submitted as a GET request to enable public profile. So your profile url should looks like http://example.com/profile/?user_id=123 . This feature is useful when you integrate this plugin with third party plugin.
You can also call some parameters in this shortcode, call=”id/email/username”, style=”table/plain/line”
To exemplify, A short demo of using this shortcode will be given by following the steps.
- At first, make a form with fields as well as shared fields according to your want.
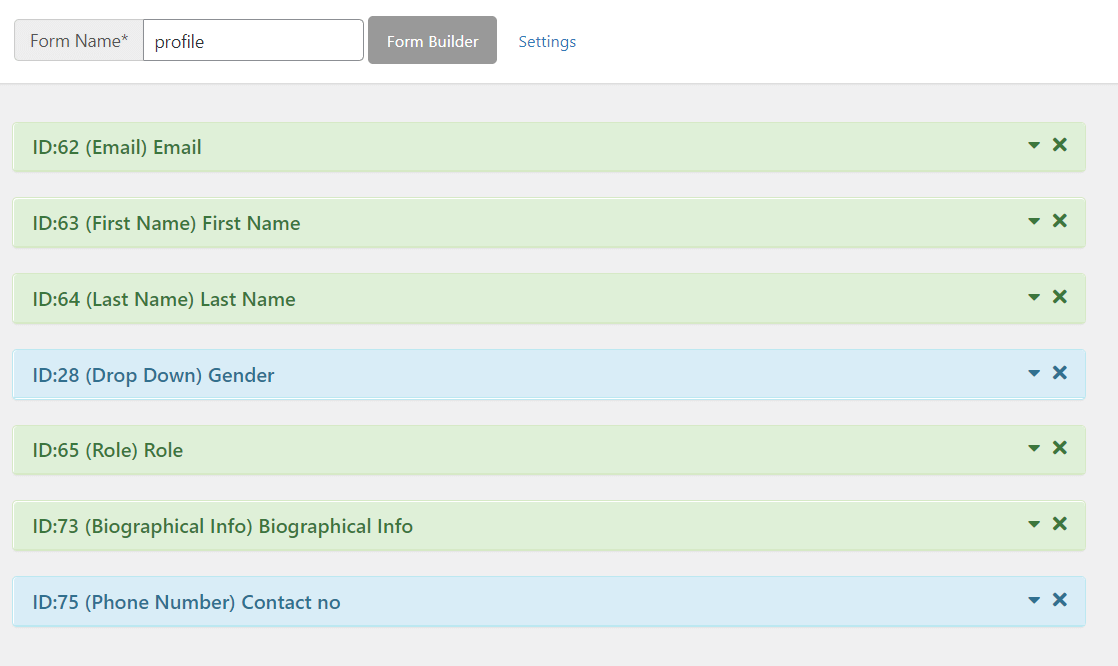
- Then, try the shortcode in any of your pages where you want to put your public profile display. Here, I am using email in the call parameter, you can use id or username too. Besides, you can even customize the style to display it with table/plain/line.

- Next, enable public profile, user_email parameter need to provided as GET request. If you use id in the call parameter then your request should contain user_id and for username it will be user_login . Here, public-profile is page permalink.
- Finally, here is the public profile display with shortcode in tabular form.

MailChimp Integration
Integrate with MailChimp and subscribe users to mailing lists upon registration.
Features:
- Connect to your Mailchimp account without installing extra addons.
- Subscription Option on Registration.
- Data Sync on Profile Update of Mailchimp Members.
- Subscribe with/without asking permission via email.
- Subscription List Selection Method by IDs.
- Tag Selection Method by Tag values.
- Merge User Data with Mailchimp Audience Fields.
- Select action on delete from User profile to Mailchimp account.
- Import/Export contacts to WordPress to Mailchimp and vice-versa.
Activation:
Activate MailChimp Integration from User Meta >> Add-ons menu by turning on the respective box’s switch.
Details:
To demonstrate, go to “MailChimp Integration >> Options” where you can set up all settings related to MailChimp integration to User Meta Pro.
API Setup:
- Firstly, Go to http://mailchimp.com/and create an account or log in if you already have one.
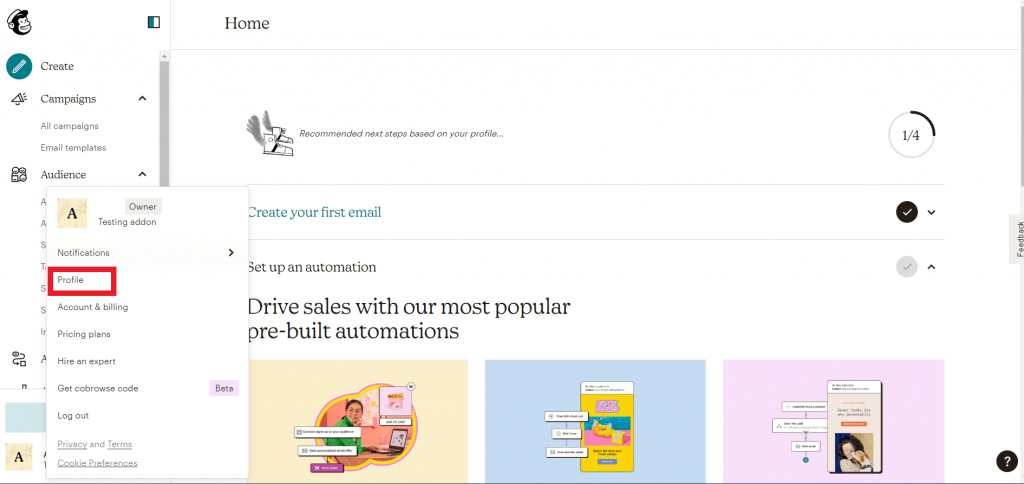
- After logging in click on the user icon and then click on “Account and Billing. Then, click on “Extras” and select “API Keys”.
- In the “Your API Keys” section at the bottom, you’ll find your API key; if you don’t already, create a new one.
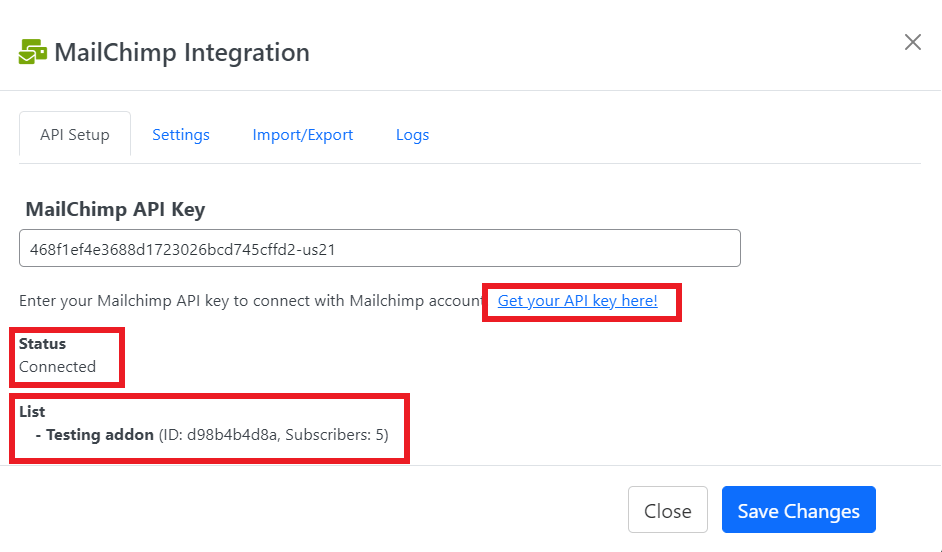
- Next, Copy the API key and enter the key to connect with your Mailchimp account. If your API is correct, the status will be ‘Connected’. Besides, you can see your created audience list name.
Configure Settings:
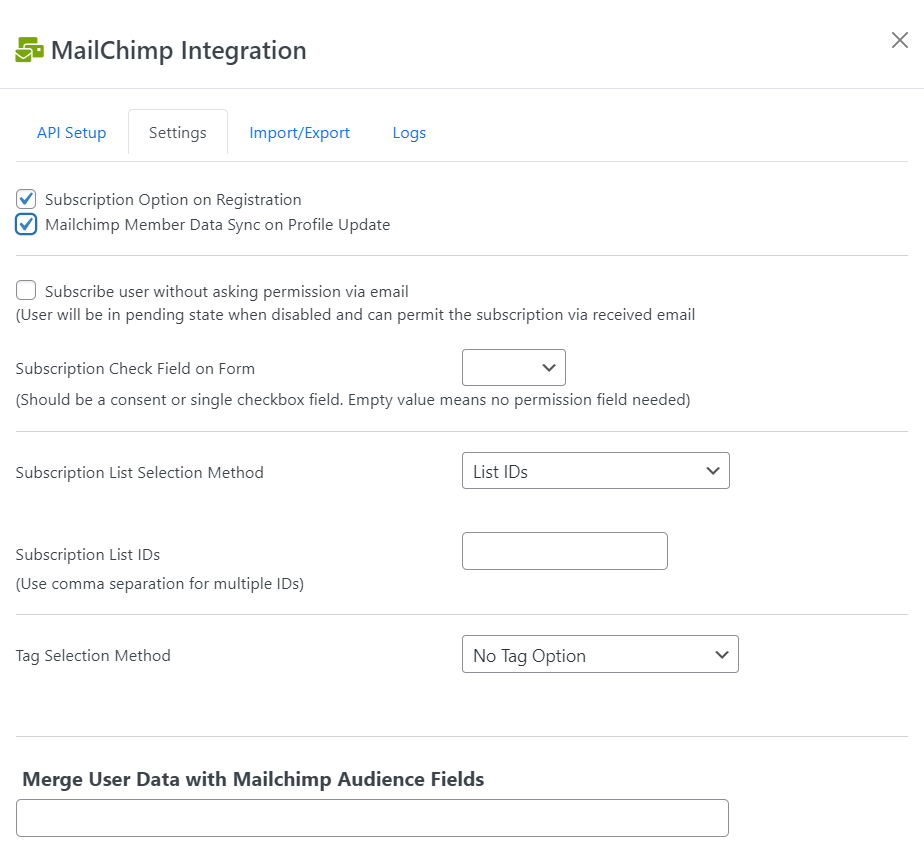
- If you click the ‘Subscription option on Registration’, it will automatically subscribe the user on every registration. Also, user profile data will synchronize to Mailchimp on profile update if you click the second option.
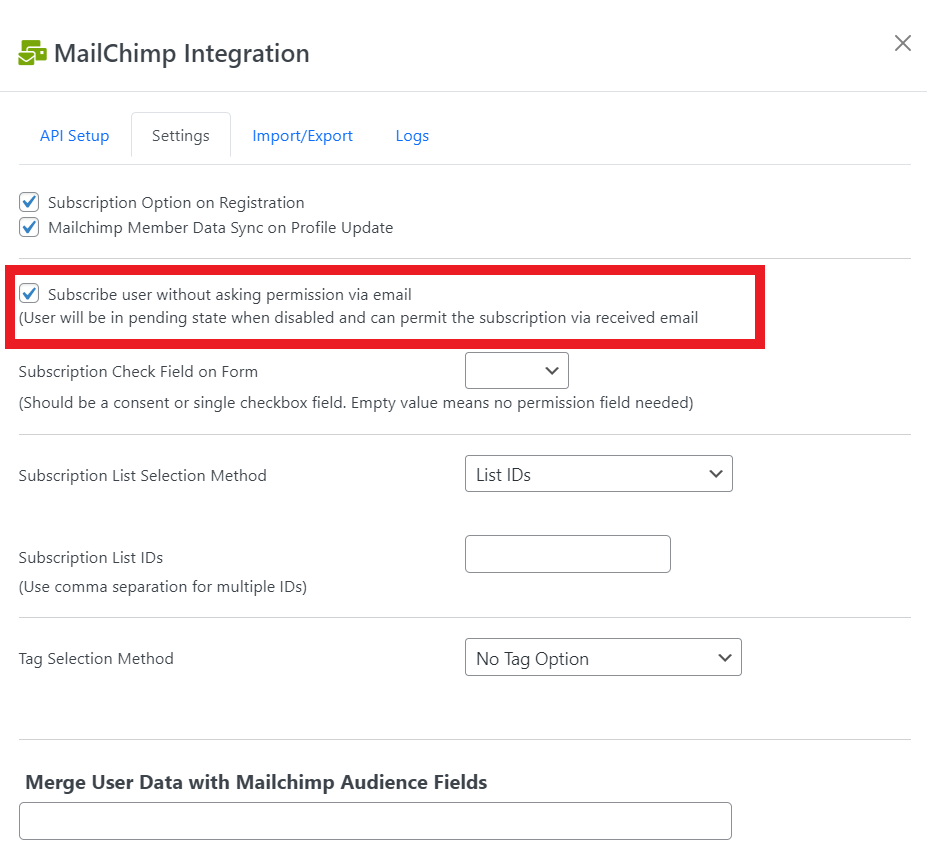
- You can subscribe user without asking permission via email if you click the option. Otherwise, the user will be pending and need to permit the subscription via received email.
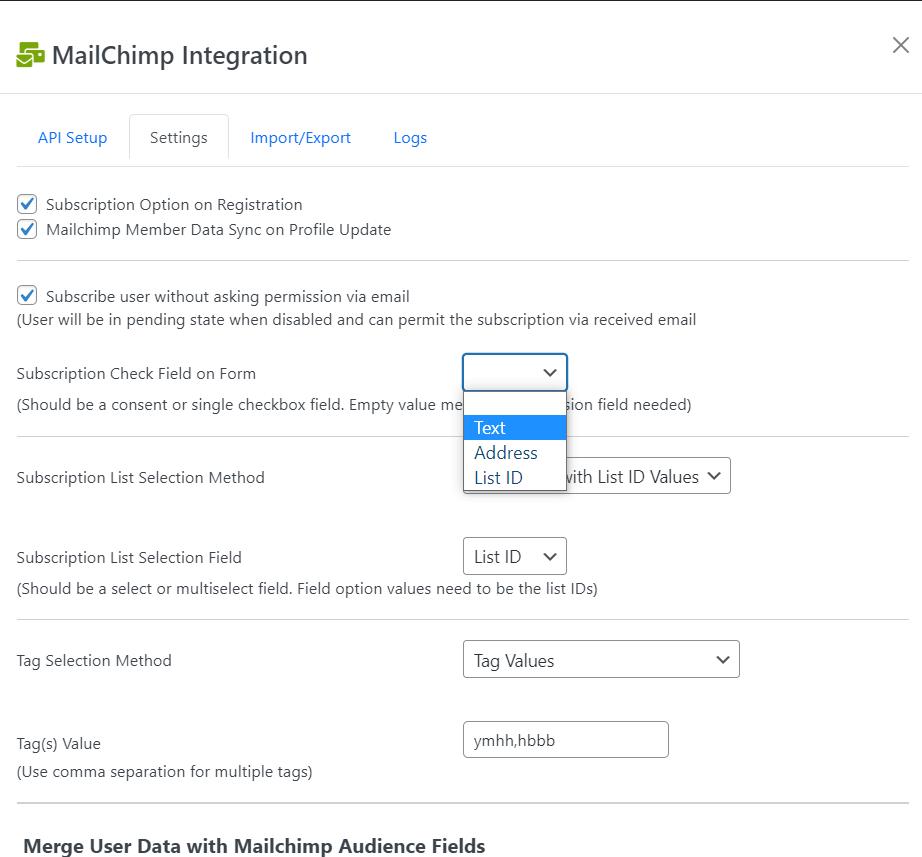
- Next, you need to select a field from the registration form to get permission to be a Subscribed user. Note that, the field should be a consent or single checkbox field. An empty value means no permission field is needed.
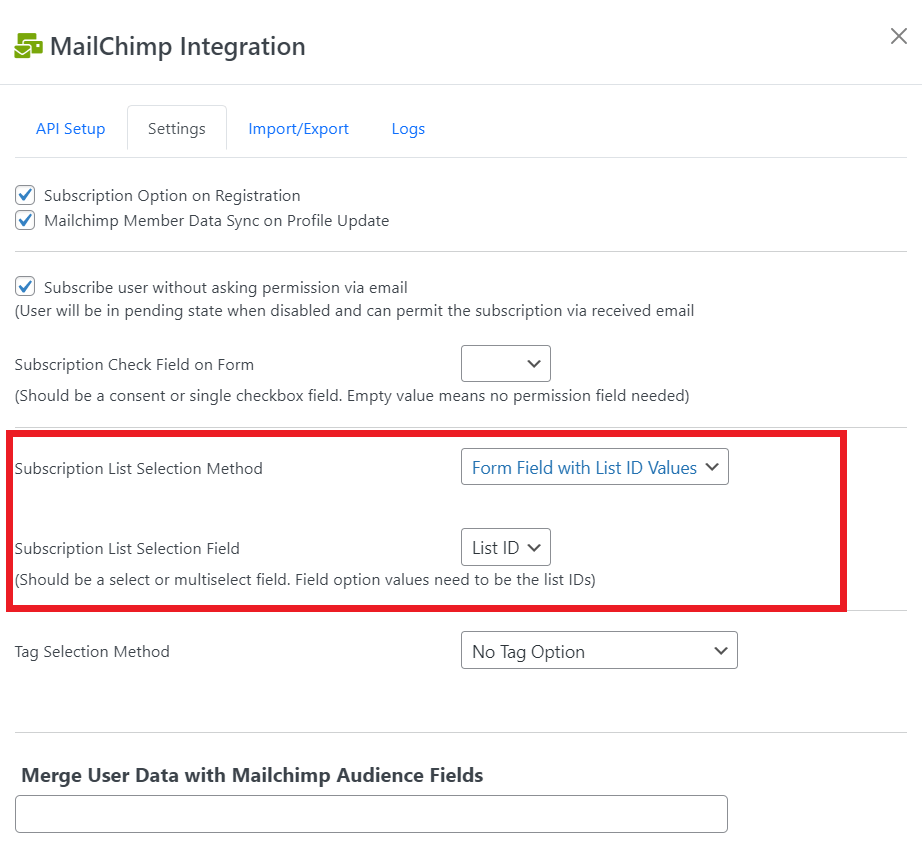
Subscription List Selection Method:
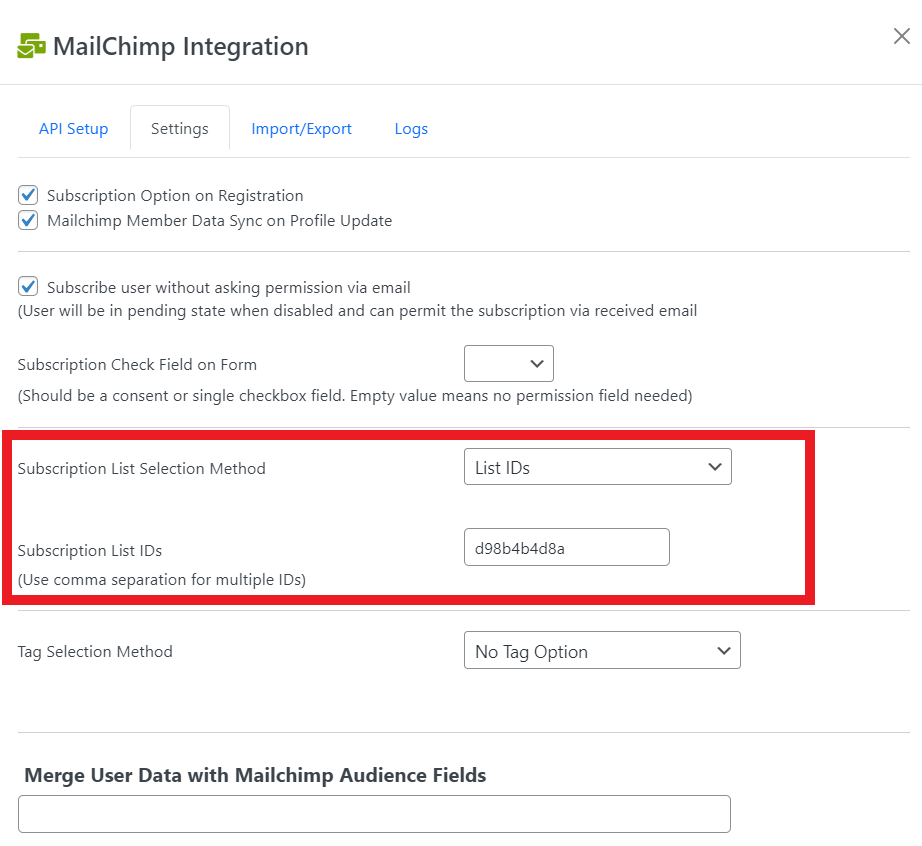
- For ‘List IDs’, you need to put your audience ID in the ‘Subscription List IDs’ field. Besides, if you have multiple audience IDs, use commas to separate them.
- If you select ‘Form Field with List-ID Values’, you need to choose a field that should be selected or multi-select. Field option values need to be the list IDs. But it is preferable to use ‘List IDs’, for the subscription method.
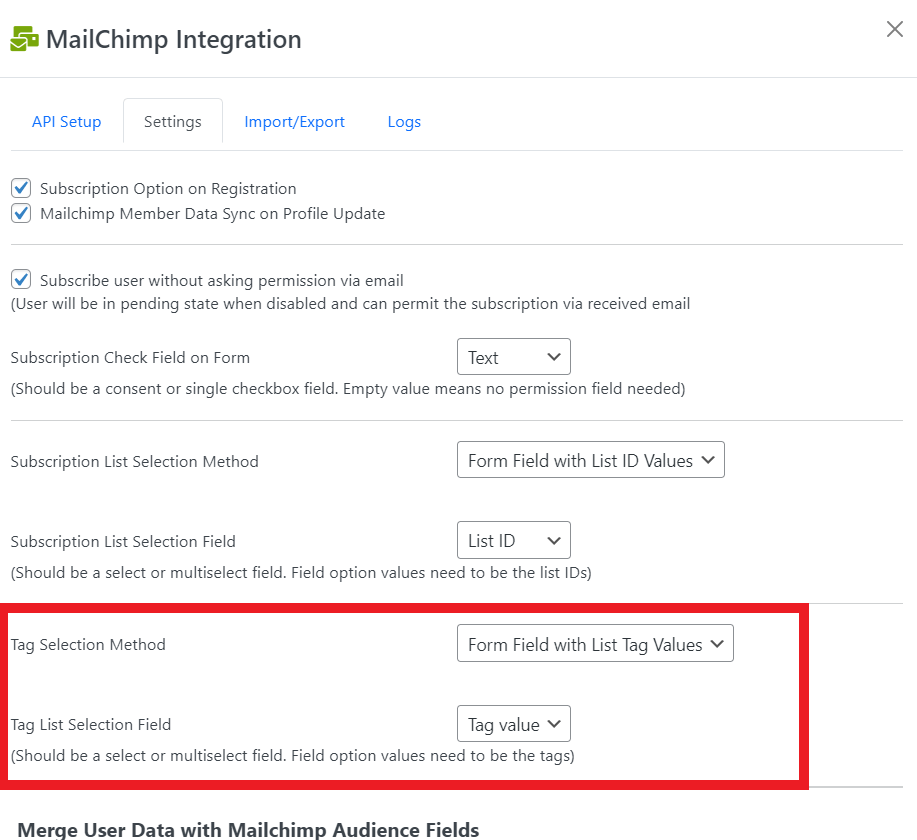
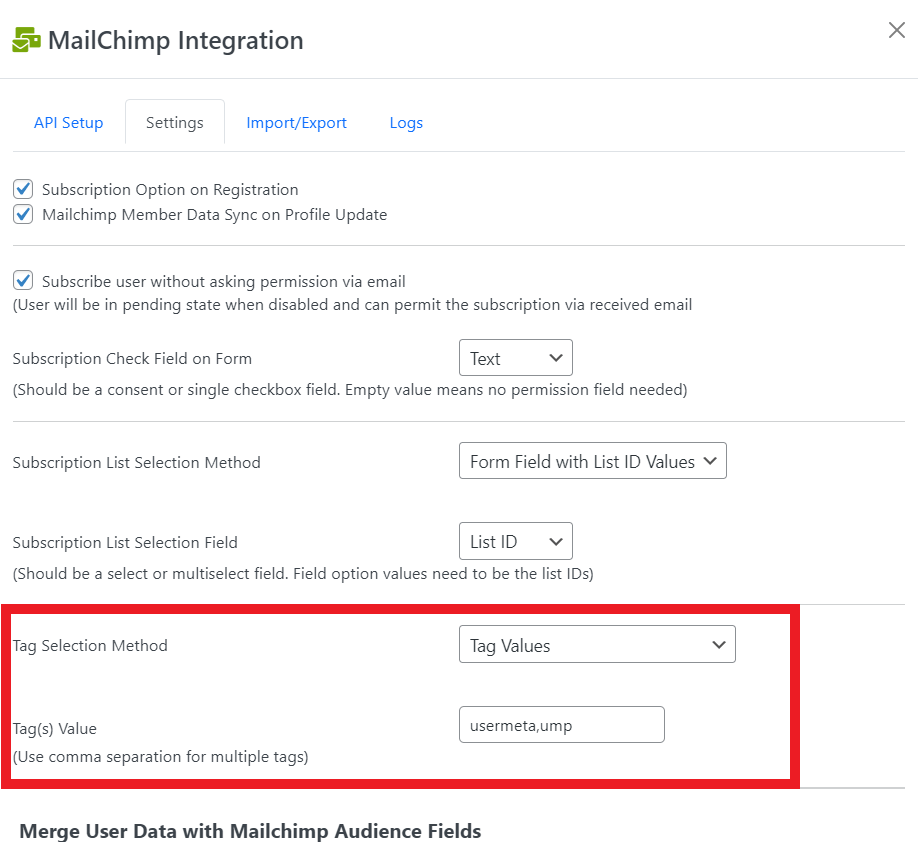
Tag Selection Method:
- If you select ‘No Tag Option’, no tag will be included.
- For ‘Form Field with List Tag Values’, you should choose a select or multi-select field. However, field options values need to be the tags.
- ‘Tag Values’ lets you include customized tag values. For multiple tags use commas to separate them.
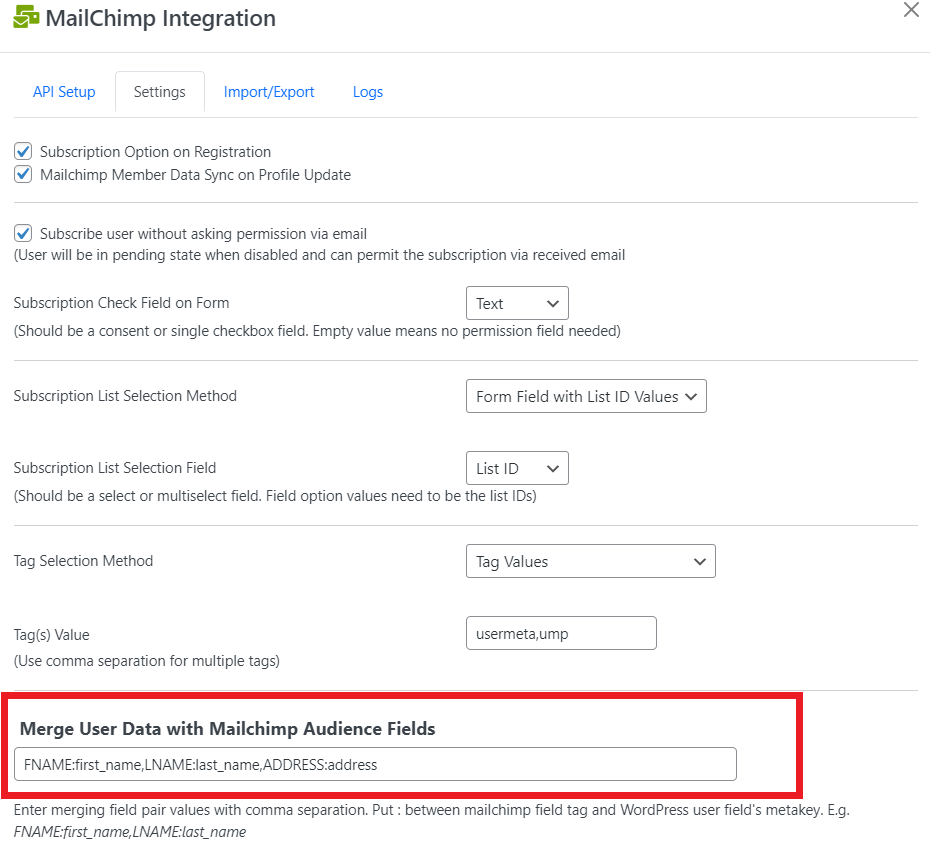
Merge User Data with Mailchimp Audience Fields:
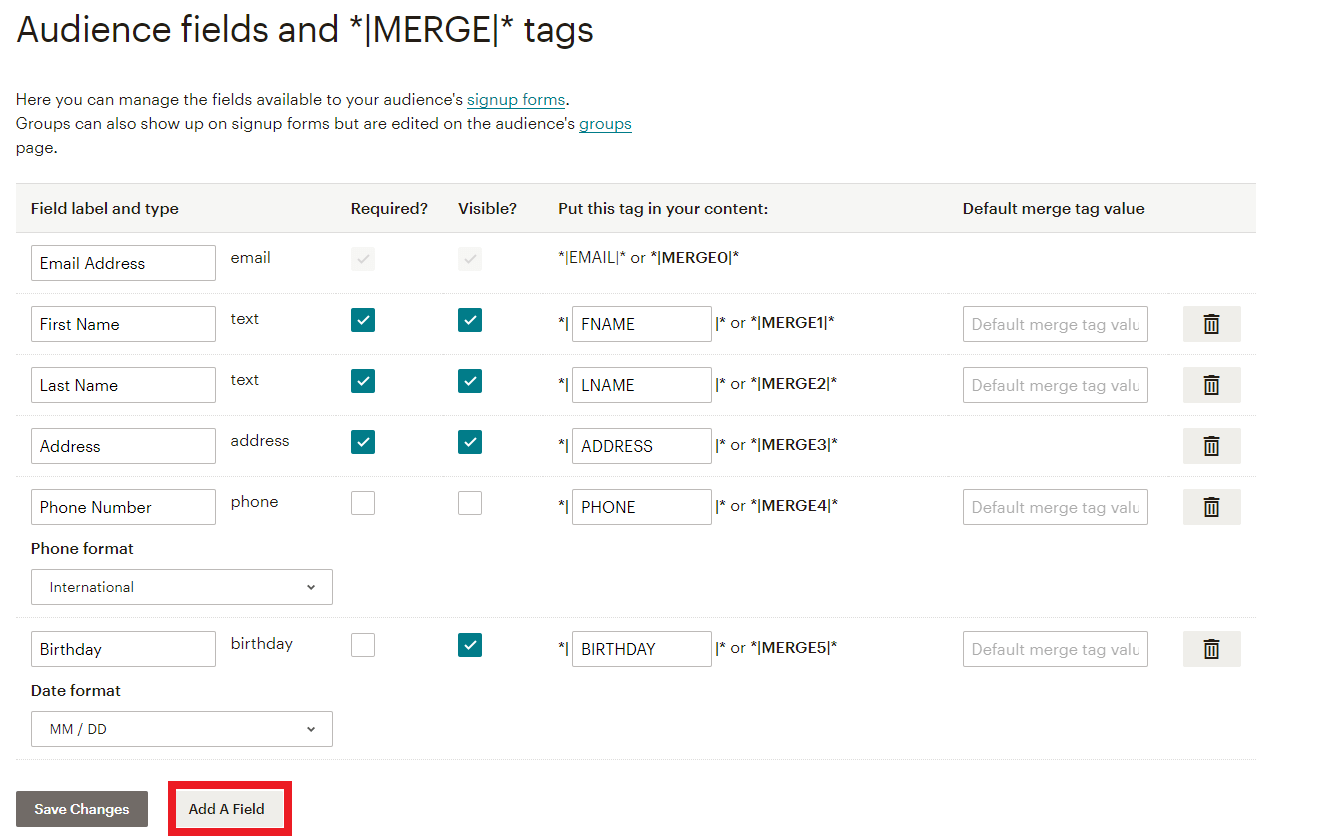
This option syncs form fields with audience fields. The audience should be set up in a specific way to get user meta from the site. However, merge field pair values should be separated by a comma. Besides, the Mailchimp field tag and the WordPress user field’s meta key should be placed between ‘:’. For example, FNAME:first_name,LNAME:last.
However, you can customize and visibility of Mailchimp audience fields and *|MERGE|* tags from the settings. Besides, click the “Add A Field” button to add more fields. Even so, select a field type and configure the field’s settings.
Action on User Delete
- The ‘No Action’ option gives no change to your Mailchimp contacts on any user profile deletion.
- ‘Remove User from Mailchimp Lists’ automatically delete users from Mailchimp contacts.
- ‘Make User Unsubscribed’ lets your contacts unsubscribe from Mailchimp on any deleted profile.
Import/Export:
From MailChimp Contacts to WordPress User
- Click “Export Audience” in the Mailchimp admin dashboard from “Audience >> All Contacts“
- Choose “Export AS CSV” and a CSV file with contacts data would be generated
- Import users through “User Meta >> Export & Import” using User Import Option
From WordPress User to MailChimp Contacts
- Export WordPress users as CSV through “User Meta >> Export & Import” where the email field is required using User Export Option
- Go to “Audience >> All Contacts” on your Mailchimp Dashboard
- Under “Add Contacts”, choose “Import contacts” and “Upload a file” option
- Upload the CSV file and confirm the status, tags, or other fields matching
Logs:
Logs will give you a confirmation notice of the success or failure of adding/deleting subscribers to the Mailchimp account. Therefore, you can even clear logs if necessary.
User Meta Pro is a well-designed, feature-rich, and easy to use user management plugin that allows front-end profile update, user registration with extra fields, email notifications and many more. As, User Meta Pro is also a versatile user profile builder and user management plugin for WordPress which has the most features on the market. So, User Meta aims to be your only go to plugin for user management. We believe in synergy so we’ve solved all of your problems in one single plugin. Since, you are looking for the details of the features, this page is for you. However, the detailed features and the addons are explained with examples. Therefore, examples will give you the clear idea of the features. Besides, if you find problem in understanding, we have some video tutorial in the video sections.


