Password
Field Configuration: To add a Password field in a form, go to User Meta >> Forms. Besides, add a new form or edit an existing one. In the Form Builder menu click Password from the right sidebar of the WordPress Default Fields section. Then. you will have a configuration panel. Next, configure your Password field by using this configuration panel.
Required validation will be applied automatically when the password field is being used for registration.
There are two parts in the field to configure. These are: basic & advanced.
Basic Configuration:
This part consists of the Field Label, Label Position, Placeholder, Description, Pattern, Error Text, Retyping Password, Password Strength Meter Retype Label, and Requirement of the current password.
Field Label: Set the field’s name whatever you want.
Label Position: Set where the name of the field will be visible. There are several options.
You can place it at the Top, Left, Right, Inline, or Placeholder. You can even hide the name by
selecting the option Hidden.
Placeholder: You can set a placeholder name for this field to provide information of the
field and use it in different places.
Description: Write the description of the field, if you want. The description will be visible under the table box.
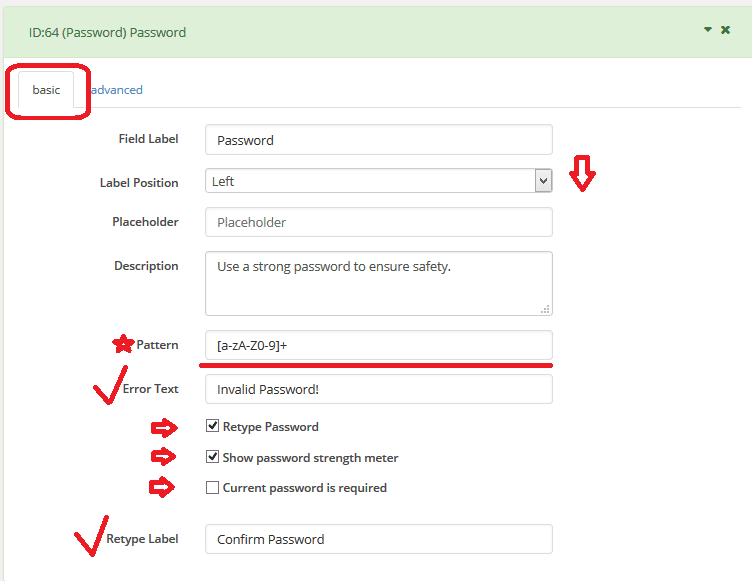
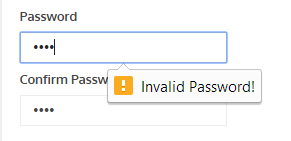
*Pattern: You can specify a pattern for the password. Only the passwords match with the pattern will be valid then. By this, you can force users to set their password in your given way.
For example: [a-zA-Z0-9]+ , this pattern is indicating alpha-numeric entry.
^(?=.*\d)\w+$ , with this pattern any alphabets are allowed but no special characters, and the password must contain at least one digit.
These patterns are also called Regex(Regular Expression).
However, you will see Error Text, if the password does not match with the given pattern.
Error Text: Set error text.
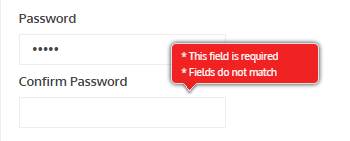
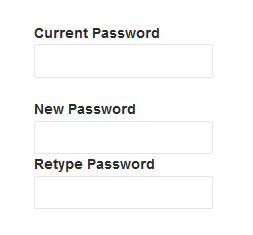
Retype Password: To enable the option of re-typing the same password for confirmation, just check Retype Password. If enabled, there will be a new option named Retype Label. Put a label text there.
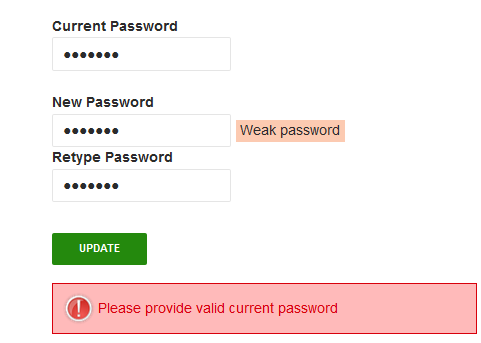
The generated retype password field is required. There will be error messages if the field remains blank or the two passwords do not match.
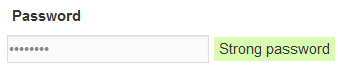
Password Strength Meter: To use password strength meter, check Show password strength meter. Password strength will appear beside the password box.
Current password is required: Check Current password is required. If you want to force user provide his/her current password to change or update existing password.
If Current Password and New Password don’t match there will be an error message.
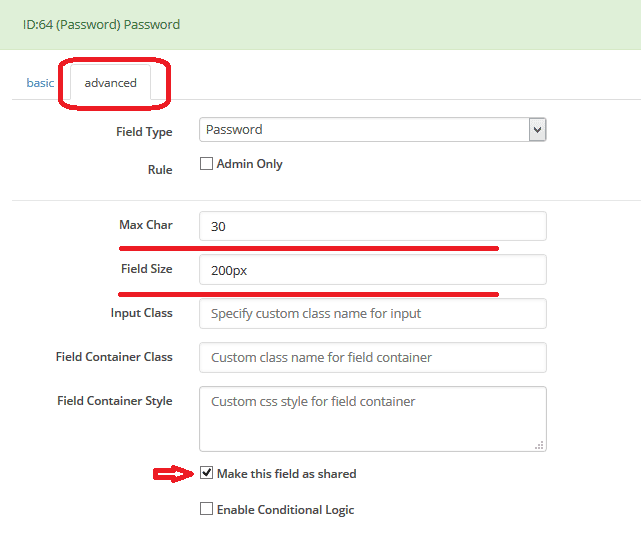
Advanced Configuration:
This part consists of Rule, Max Char, Field Size, Input Class, Field Container Class, Field Container Style, Make the Field as Shared and Conditional Logic.
Rule: You can set rule Admin Only.
Max Char: Set the limit of maximum allowed character in the field. If you want to allow maximum of 30 characters in the field then just write 30 in the box.
Field Size: Set the size of the field. For example: to make a 200px field just write 200px in the box.
Input Class: Can specify custom class for input. Write the custom class name.
Field Container Class: Can set custom class for field container. Write the custom class name.
Field Container Style: Can set custom css style for field container.
Make Field as Shared: To make this field as a shared field to use the field in any form just check Make this field as shared.
Conditional Logic: To apply conditional logic to this field Enable Conditional Logic. To know about conditional logic, read Fields Basics.