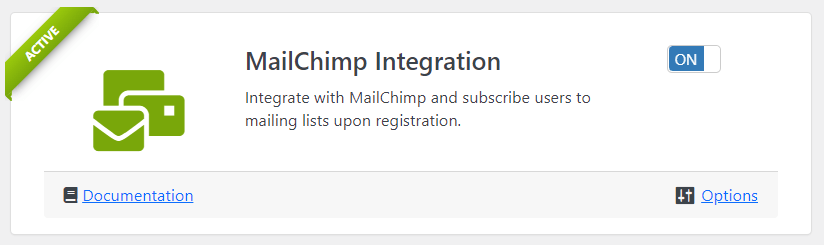
MailChimp Integration
Integrate with MailChimp and subscribe users to mailing lists upon registration.
Requirement: User Meta Pro 3.0
Features:
- Connect to your Mailchimp account without installing extra addons.
- Subscription Option on Registration.
- Data Sync on Profile Update of Mailchimp Members.
- Subscribe with/without asking permission via email.
- Subscription List Selection Method by IDs.
- Tag Selection Method by Tag values.
- Merge User Data with Mailchimp Audience Fields.
- Select action on delete from User profile to the account.
- Import/Export contacts to WordPress to Mailchimp and vice-versa.
Activation:
Activate MailChimp Integration from User Meta >> Add-ons menu by turning on the respective box’s switch.
Details:
To demonstrate, go to “MailChimp Integration >> Options” where you can set up all settings related to integration to User Meta Pro.
API Setup:
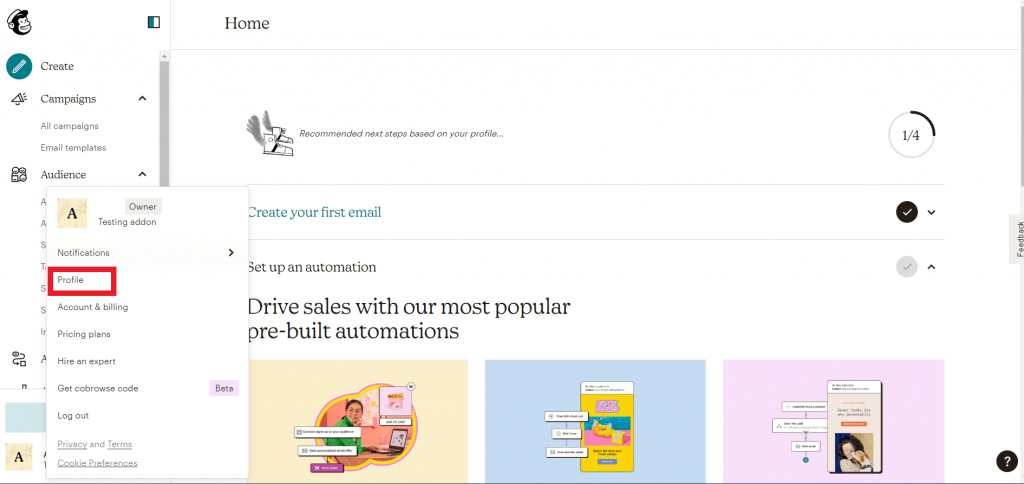
- Firstly, Go to http://mailchimp.com/and create an account or log in if you already have one.
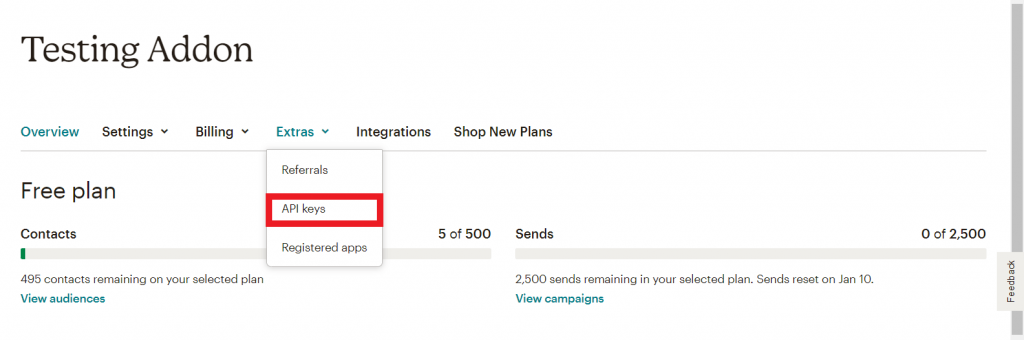
- After logging in click on the user icon and then click on “Account and Billing. Then, click on “Extras” and select “API Keys”.
- In the “Your API Keys” section at the bottom, you’ll find your API key; if you don’t already, create a new one.
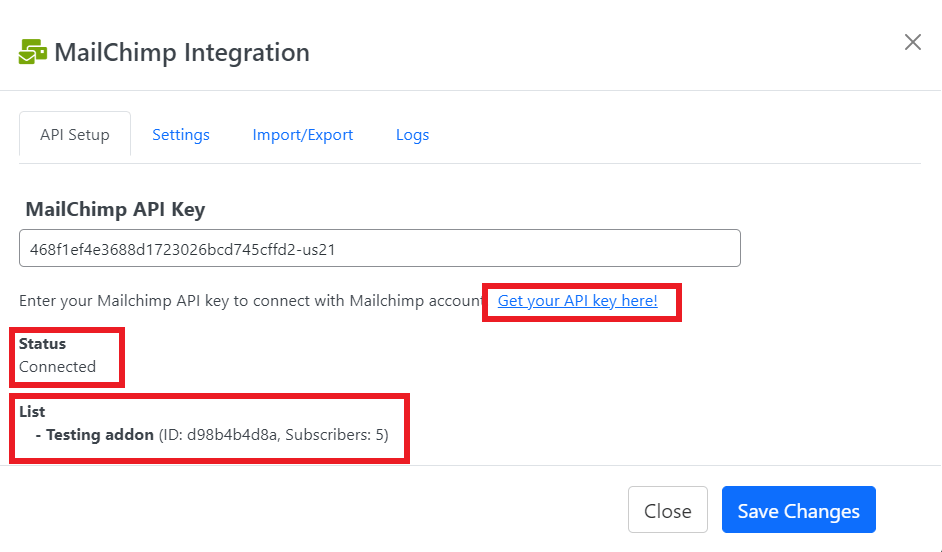
- Next, Copy the API key and enter the key to connect with your Mailchimp account. If your API is correct, the status will be ‘Connected’. Besides, you can see your created audience list name.
Configure Settings:
- If you click the ‘Subscription option on Registration’, it will automatically subscribe the user on every registration. Also, user profile data will synchronize to Mailchimp on profile update if you click the second option.
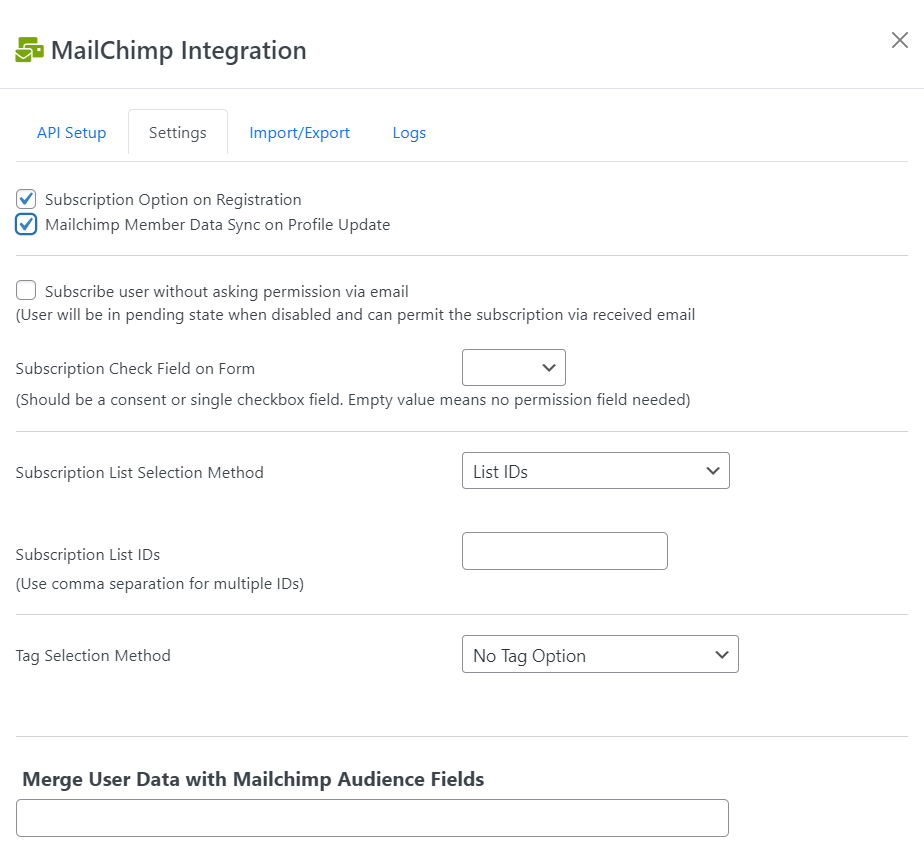
- You can subscribe user without asking permission via email if you click the option. Otherwise, the user will be pending and need to permit the subscription via received email.

- Next, you need to select a field from the registration form to get permission to be a Subscribed user. Note that, the field should be a consent or single checkbox field. An empty value means no permission field is needed.
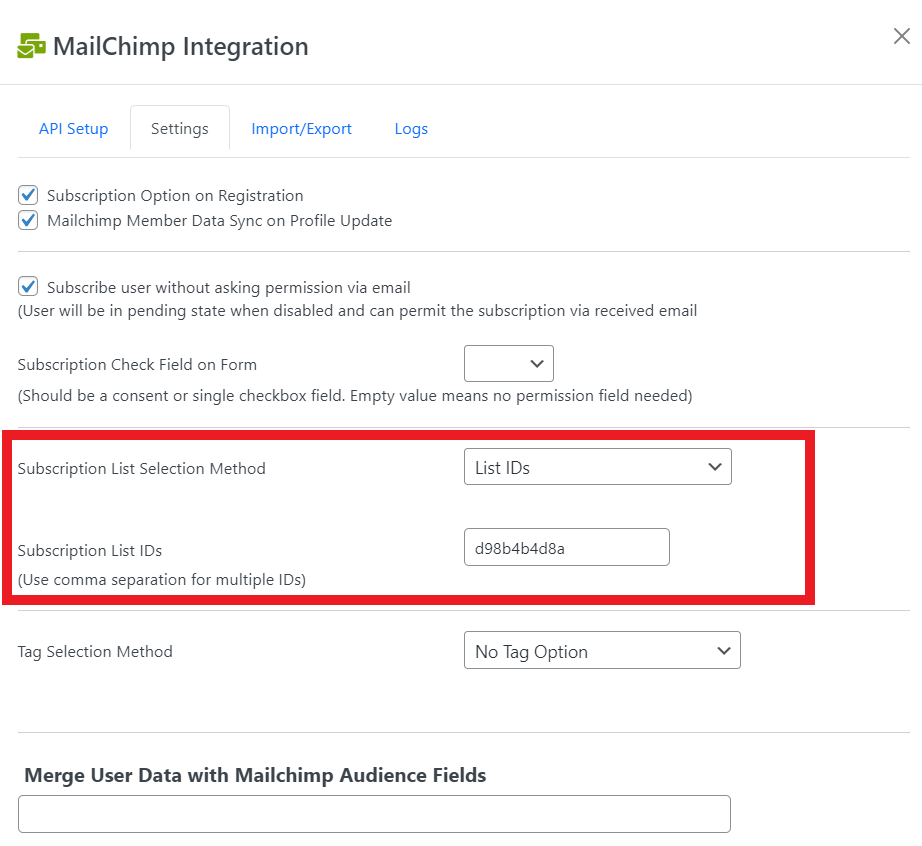
Subscription List Selection Method:
- For ‘List IDs’, you need to put your audience ID in the ‘Subscription List IDs’ field. Besides, if you have multiple audience IDs, use commas to separate them.
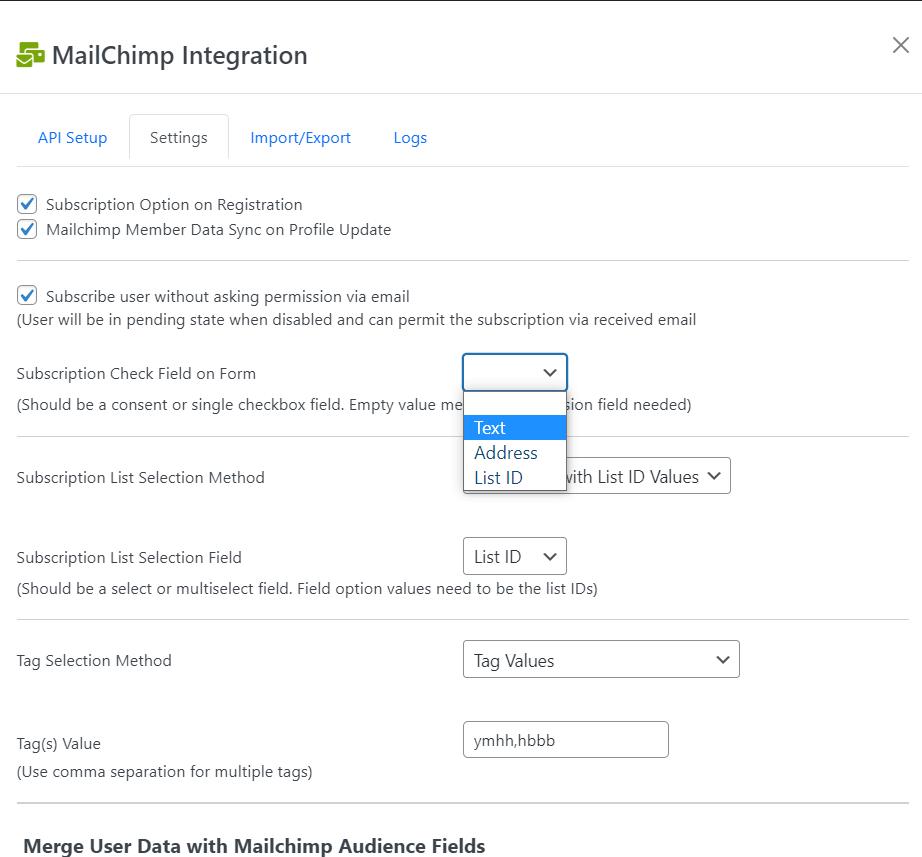
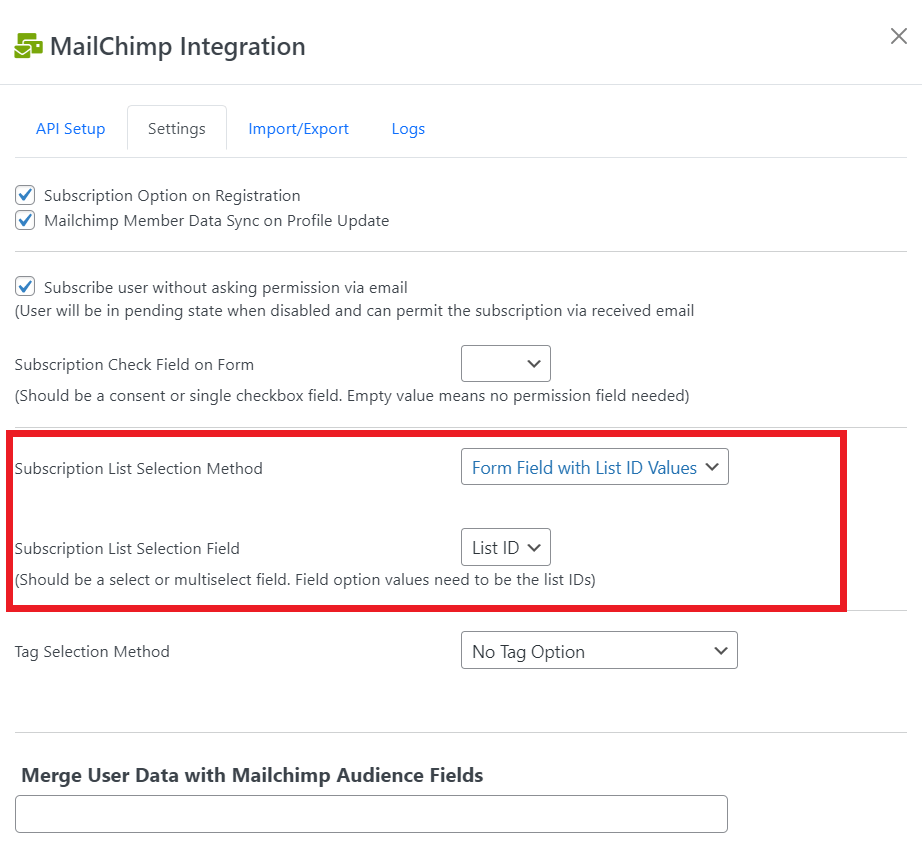
- If you select ‘Form Field with List-ID Values’, you need to choose a field that should be selected or multi-select. Besides, field options values need to be the list IDs. But it is preferable to use ‘List IDs’, for the subscription method.
Tag Selection Method:
- If you select ‘No Tag Option’, no tag will be included.
- For ‘Form Field with List Tag Values’, you should choose a select or multi-select field. However, field options values need to be the tags.
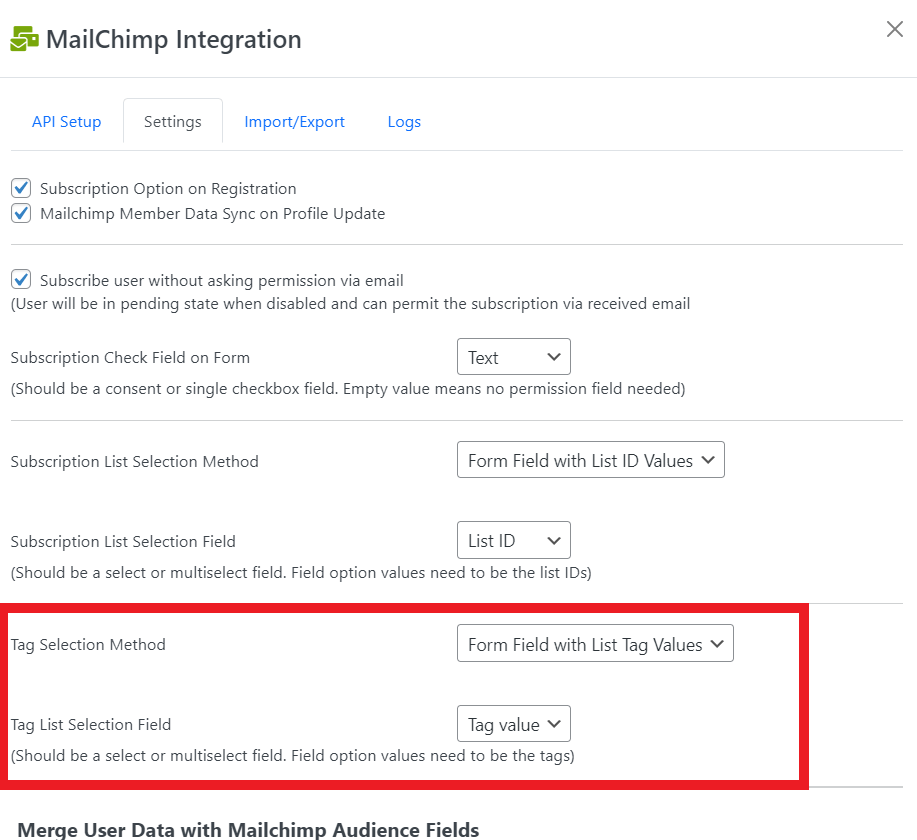
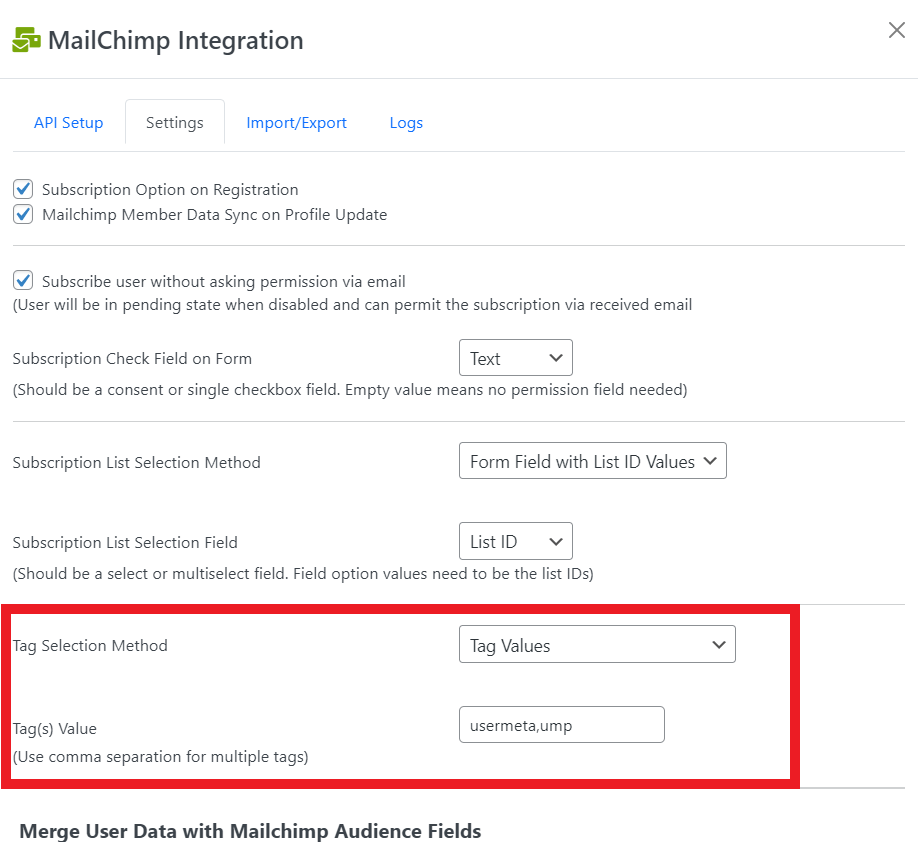
- ‘Tag Values’ lets you include customized tag values. For multiple tags use commas to separate them.
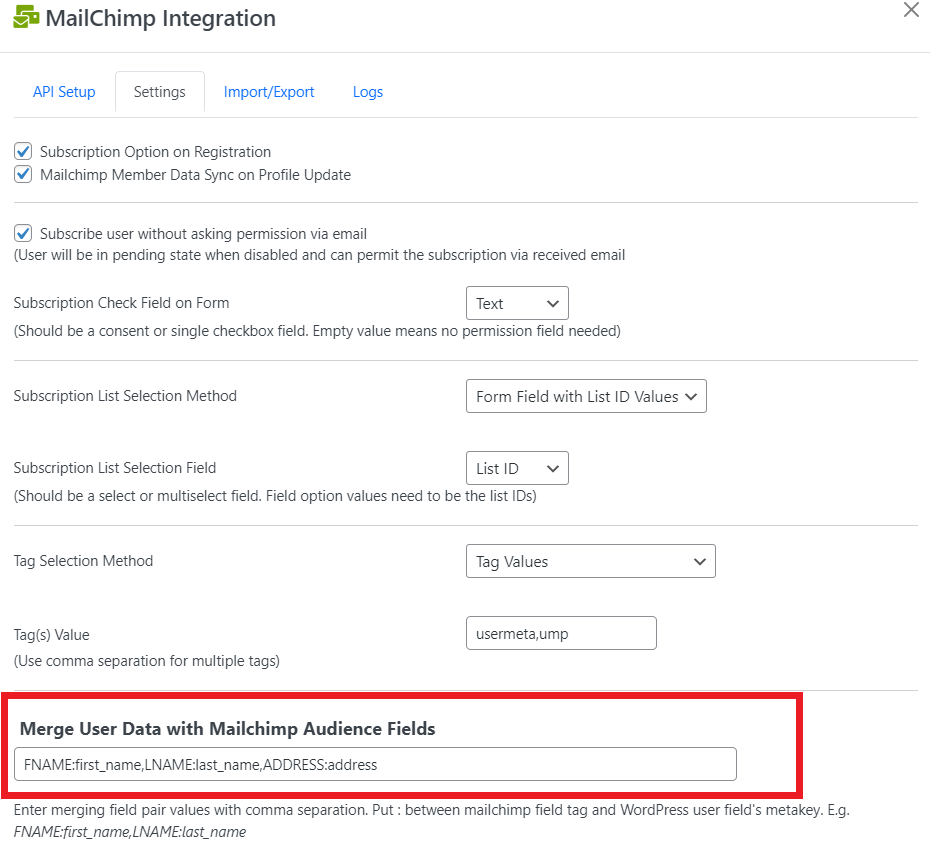
Merge User Data with Mailchimp Audience Fields:
This option syncs form fields with audience fields. The audience should be set up in a specific way to get user meta from the site. However, merge field pair values should be separated by a comma. Besides, the Mailchimp field tag and the WordPress user field’s meta key should be placed between ‘:’. For example, FNAME:first_name,LNAME:last.
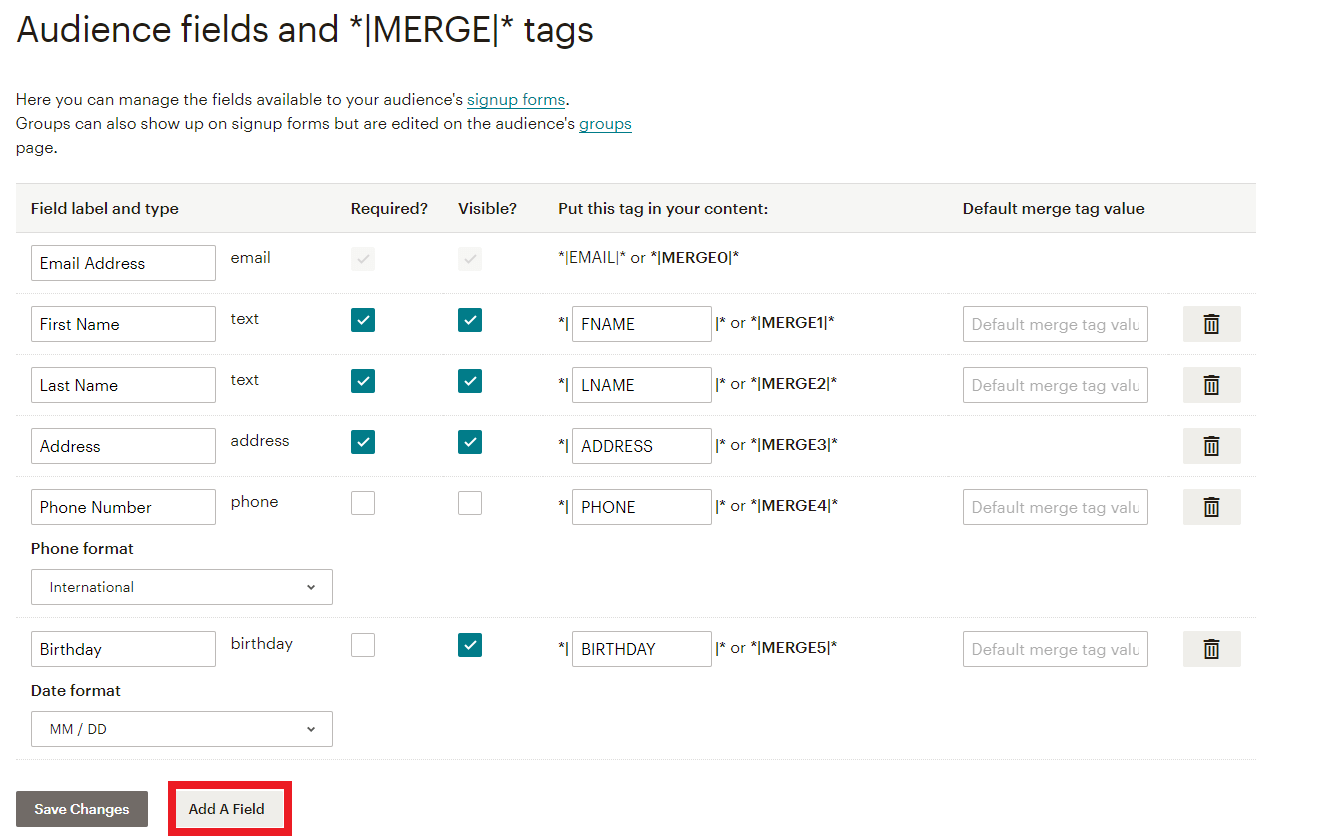
However, you can customize and visibility of Mailchimp audience fields and *|MERGE|* tags from the settings. Besides, click the “Add A Field” button to add more fields. Even so, select a field type and configure the field’s settings.
Action on User Delete
- The ‘No Action’ option gives no change to your Mailchimp contacts on any user profile deletion.
- ‘Remove User from Mailchimp Lists’ automatically delete users from Mailchimp contacts.
- ‘Make User Unsubscribed’ lets your contacts unsubscribe from the account on any deleted profile.

Import/Export:
From MailChimp Contacts to WordPress User
- Click “Export Audience” in the Mailchimp admin dashboard from “Audience >> All Contacts“
- Choose “Export AS CSV” and a CSV file with contacts data would be generated
- Import users through “User Meta >> Export & Import” using User Import Option
From WordPress User to MailChimp Contacts
- Export WordPress users as CSV through “User Meta >> Export & Import” where the email field is required using User Export Option
- Go to “Audience >> All Contacts” on your Mailchimp Dashboard
- Under “Add Contacts”, choose “Import contacts” and “Upload a file” option
- Upload the CSV file and confirm the status, tags, or other fields matching
Logs:
Logs will give you a confirmation notice of the success or failure of adding/deleting subscribers to the account. Therefore, you can even clear logs if necessary.
